Sunday, November 25, 2012

Grading Shortcut For Patternmaker's Without Pattern Maker Software

Wow,  sorry there's often so much time between posts,  it's been a struggle between projects,  my kids devouring computer time and other responsibilities but,  I never forget about my patternmaker blog and while I get more experience in pattern cutting and grading I'm slowly coming across different shortcuts and techniques as well.

I haven't actually gotten around to doing any grading work on my sloper library lately,  but this weekend I figured out a way to grade both the front and back sloper sections simultaneously to save a bit of time.  This is how I managed it:

First you've got to slice your sloper sections up in the required areas,  then,  because the sliced portions of the front and back sections have to spread apart the same amount of distance all you really need to do is group together the corresponding vertical and horizontal portions and move them to where they need to be.   See below for an example:

Vertical Sections Selected For Spreading
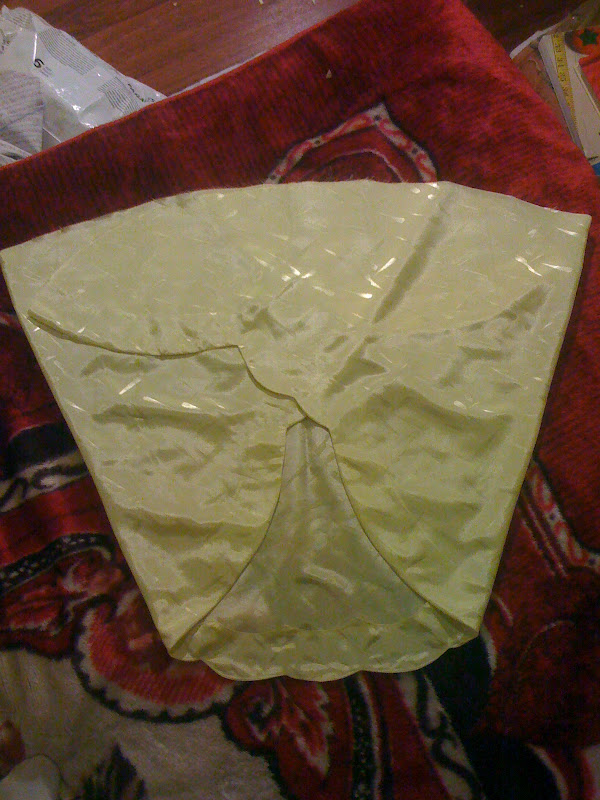
Horizontal Sections Selected For Spreading
Now,  when your doing any kind of patternmaking work, grading or drafting,  you've got to always check things over,  your measurements of everything,  the 1/2" difference between the front and back sections and their armscye curve measurements,  then the sleeve curve ease and the shoulder notch.  All are small things,  but even in computer software,  if you're not using pattern maker software,  you could accidentally move something or even resize something and through off all your work.  

I spent the weekend tweeking my previous slopers to make sure measurements were in order,  no errors or anything that could pose a problem and then got started with grading my bodice sloper and it's sleeve up to size 12.   Yes,  I'm still working on grading up to Butterick size 24 so I can work with some online clothing companies I want to do business with.   I'm very excited getting my own patterns drafted finally.  But about doing business as a designer or patternmaker,  you've got to know what you're getting into and get ready for the long haul if you're not going to a complete, "you're going to learn everything" kind of fashion design course.  

First of all,  checking out my competition,  other patternmakers don't just have portfolios and years of awesome experience with designers everyone's heard about.   I've noticed patternmakers online offer a full range of services from pattern cutting,  grading,  sample making,  marker preparation,  spec sheets,  the works.  Basically, you want to have friends that do these things or you want to know how to do all of these things single handedly.  It's tough.  But,  don't shy away from it if this is what you want to do,  all I tell myself for example,  is that it's all a matter of reading a few more books and working on these skills.  That's pretty much all it takes.  Never let the time something may take deter you from learning how to do something you want to do, just do it.

As both a patternmaker and hopeful designer, while doing other people's patterns and eventually drafting my own patterns so I can get boutiques to sell my designs,  once the photos from their promotional campaigns start coming in,  I'll have my portfolio coming together without any extra cost and what could be cooler then that?  How long is this going to take??  Maybe another year or two I'm thinking,  but that's fine because it'll just get me more experience under my belt and I'll develop the confidence to take my endeavors to the next step like working for a company or a couple companies as a regular staff member or service provider.  :)  hehehe,  New York,  Paris,  Milan... Vancouver and Dubai here I come.

If you are interested in my discount digital pattern cutting or digitization service however,  or you have any questions,  please email me for more information at stylistwithacause@gmail.com or visit my Facebook page to learn more.

Thursday, November 8, 2012

Practical Pattern Cutting Tips

As I work on my pattern cutting work,  (I've got a few clients at the moment after not actually having any for a while) I realize having gotten a bit rusty in a few areas has it's benefits of helping crystallize some key procedures that need to take place during the drafting of a pattern.

First,  sometimes when you have a cool design to do for your designer,  say you really like the style lines in the garment, you may be tempted to start drafting up the style lines on the pattern sloper before you take care of deciding the exact placement of where the silhouette and length lines should be.  Don't do this, you'll make the pattern cutting a repetitive process of adjusting and re-adjusting as you re-tweek style lines to properly accommodate the designer's intended look.

Second,  notches.  When you've drafted the main pattern blocks for a garment,  you may sometimes be tempted to start placing your notches in their corresponding places (don't put them on the center of any seam lines though,  as pieces can get sewn upside down and miss-matched this way).  This is not the right time to notch so don't fall for it.  You've got to make sure you've decided on you facing shape lines( if you're using facings) and drafted the other attached but smaller pattern pieces first so that it's easier and quicker to place accurate notches,  in all their correct places rather then having a couple notching and notch adjusting sessions.

Third,  whenever possible do all similar work on your pattern as a single step in the over all process of drafting your pattern.  This doesn't include measuring though (for example,  when you draft a basic bodice pattern,  you've got to measure the armscye to correctly check the curve on the sleeve block before preceding with anything else).  However,  when you've got your basic sloper set up for a design,  do all the silhouette and length drafting first such as neckline depth, waistline placement,  hems,  sleeve lengths etc.  Zipper and button plackets are next.  Then place your style lines on each of the pieces.  Then draft your facings,  hem facings and hems lengths.  In digital pattern making I create my facings by setting up a shaped line that will be used to 'cut' through a copy of the main pattern block so that the seams and shapes will be identical to the main garment block.  However,  I don't 'cut' the facing out till all the notching work is complete so that I can simply copy the notches as well as the facing pieces to eliminate double measuring of notch placements.

So when you're drafting up your patterns,  keep these practical pattern cutting procedures in mind to speed up your work and help keep it more accurate as well.  After all,  accuracy is just about everything in pattern making.  And as they say,  time is money.

If you are interested in my discount digital pattern cutting or digitization service however,  or you have any questions,  please email me for more information at stylistwithacause@gmail.com or visit my Facebook page to learn more.

Monday, September 24, 2012

Pattern Grading Experiment For Pattern Cutting Skill Development

The results for yesterday's pattern grading experiment for expanding my pattern cutting skills.  The red bodice pattern and sleeve blocks are the 'Internet' grade I did.  This is where a pattern is simply scaled down or up to whatever size it needs to be.  For example if you need to grade a size 6 up to a size 8,  you've got to increase bust,  waist and hip measurements by 1" and this is what I was doing.

Because I'm working with half the front and back bodice sections,  you've got to change each using a 1/4 of the over all grade,  in this case I had to add on 1/4" to the front and back sections and do almost the same for the vertical measurements as well.

The green bodice pattern and sleeve blocks however,  were graded according to Connie Amaden Crawford's book on grading.  First you've got to section the blocks in certain horizontal and vertical areas,  then you've got to figure the amounts to spread them outward or inward to enlarge them or decrease the block's size,  respectively.  (A little bit needs to be reserved  for the hip measurement so it's left out when the bodice section  is being vertically graded). A detail totally neglected in the 'Internet' method.

Click to see the actual difference between the aligned patterns.

Here,  I've aligned the green version over the red version and it turns out that the red version is a bit bigger then it's supposed to be and a bit longer as well.  You'll have to click on the link to really see the difference,  but it's a bit too much of a difference.  On a lazy day,  I might grade a pattern using the 'Internet' method if I was working on a pattern I'd be sewing for myself,  like to wear right... maybe.   However,  seeing as how Kathleen Fasanella said that when pattern cutting professionally,  your patterns can't have as much as 1/32 of a error,  I think I'd better stick to Connie Amaden Crawford's grading technique when I'm doing client work.   No questions or doubts about that in my mind.

So now, I've got to check the armscye balance,  that's the armhole measurement,  adjust the curves,  check and possibly adjust the sleeve cap curve and ease,  place the notches in their correct places and give them their 1/2" seam allowances.   Then I'll take this size 8 (Butterick standard) and grade it up to a size 10 getting ready to do some work for a client.

For all those aspiring designers and those who want to learn pattern cutting,  I'll be offering these additional sizes of blocks for only $5,  once I've got my pavment store set back up on my facebook page,  so stay tuned,  hopefully over the course of this coming month you'll see these new size 8 and size 10 bodice patterns available.


If you are interested in my discount digital pattern cutting or digitization service however,  or you have any questions,  please email me for more information at stylistwithacause@gmail.com or visit my Facebook page to learn more.


Wednesday, September 19, 2012

How To Make A Pattern For Fashion Design


Have you designed some clothes or a collection you want to get made and can't go forward because you don't know how to make a pattern and you can't afford to hire a patternmaker? Many aspiring designers and home sewers run into a bit of problem brining their own fashion designs to life because they lack pattern cutting skills and the field of pattern cutting is rather daunting for many. However, there is a very cheap short cut you can take to easily learn how to make a pattern for your fashion designs.

In pattern cutting you always start with a basic bodice pattern or the phase 2 sloper made from it, for example the blouse sloper would be used for a blouse design and a torso block would be used for dress pattern cutting.


(click image to see a larger version)

While its ideal to learn how to draft these basic pattern slopers / blocks from scratch either from a book like Connie Amaden Crawford's Patternmaking Made Easy” or from an online video draping lesson or an actual fashion design course that teaches pattern drafting, you can purchase the basic bodice blocks from companies like Butterick or from patternmakers such as myself (click to see my basic bodice block service on Fiverr). Or, if you have an existing fitted blouse or dress pattern with a bust or shoulder dart as well as a waist dart or fisheye dart, you can tweak it to your own measurements if needed (ease elimination) and bust point location (if it's not already accurate).


(click image to see a larger version)

If you have a bodice pattern or blouse or dress pattern with a waist / fish eye and bust dart you'll need to pivot the art to the center shoulder seam to create a true basic bodice pattern block, particularly if the garment you've designed is a princess seam style.

There should be only 3/4" ease in the armscye / armhole depth and 1/2” ease at the the armscye side seam corner. Also, there should be no ease in the waist for your basic bodice sloper. The neckline should lie just above the central collar bone at the front and it should just hit the bottom of the neck at the back.

Once you've got your bodice pattern complete you're ready to start drafting the second block which usually involves adding a bit more ease (typically at the waist/hips or armholes) or pivoting the darts from the bust point into different locations (this is done by drawing and slashing a new dart placement line, then cutting out the original dart take up and closing it to allow the new dart to open so it can be filled in with paper and the new bodice or torso block can be made) or converting this dart ease to gathering or pleats. Note: This is called dart manipulation. Darts should always be pivoted from the bust point because if they aren't your resulting patterns and garments won't hang or sit correctly.


(click image to see a larger version)


(click image to see a larger version)

If ease was eliminated from the armscye seam the sleeve pattern may also need to be adjusted if there is more than 1 1/2" ease in the sleeve cap. Leaving at least 1" ease in the sleeve cap,  determine the amount of ease to be eliminated.  This amount will need to be divided into three equal portions. Then half the length of one portion is how much you'll overlap the sleeve sections once you have the sleeve pattern cut out and slashed correctly.

To correctly slash the sleeve, first cut away all the sleeve seam allowances then fold the sleeve in half, matching underarm seams. Then fold again matching the centre fold line to the underarm seams. Each of these fold lines should then then be slashed to just before the wrist then overlapped by the previously determined amount.

If the sleeve pattern is for a fitted sleeve, the alterations method is simple an you most likely won't need to adjust the wrist ease or just a bit.

However, if the sleeve has excess wrist ease and the pattern you want to make is more fitted, reduce the ease by measuring your elbow circumference (if you're a size 14 or over,  add 1 1/2" ease). Draw half the length of the the new elbow circumference line from the centre of the sleeve outward along the sleeve's original elbow line. Then draw a line from the the armscye / side seam point to the wrist and cut away the excess ease.

On a new sheet of paper draw a new sleeve cap line then measure it to make sure it matches the combined front an back armscye measurements plus at least 1" and no more then 1 1/2" and that the shoulder seam notch at the top of the sleeve is offset only 1/4" toward the front, past the true sleeve center.   Should your sleeve have inadequate ease (less then 1") then reverse the above ease reduction process,  to instead slash and spread to add ease. 

Correct all your front and back matching notch positions on your sleeve and bodice pattern blocks and you're done.

Now, if you happen to have a scanner and also use a vector program like Adobe Illustrator or Corel Draw, you can scan your completed bodice patterns into the computer and re-create them as vector files and then actually conduct dart manipulations in these software applications (the technique I use in my pattern cutting work).

With these basics on how to make a pattern you can easily go from there and start developing your own clothing design patterns or you can conduct further research online or at your library for additional patternmaking tips on style elements such as collars, sleeve types and more as well as other learn other pattern cutting secrets.

If you are interested in my pattern cutting or digitization service however,  or you have any questions,  please email me for more information at stylistwithacause@gmail.com or visit my Facebook page to learn more.


Monday, September 10, 2012

In Need Of A Discount Digital Pattern Cutting Service?


If you are looking for a pattern cutting services as in an individual who can provide you with pattern drafting / pattern making skills to provide you with finished garment patterns, and you're also looking for a discount, then you've come to the right place.

Unlike other pattern makers I don't charge the high fees for my discount digital pattern making services. As a beginner in the industry, I will draft your clothing patterns for only $35 per garment item, and include free alterations should your pattern(s) need any adjustments.

The first step in my pattern cutting service will include a free drafting of a basic bodice pattern called a sloper, in the size or sizes you require, ( according to the Butterick standard size chart). Then the appropriate blocks which are also completed free of charge will be constructed for the given garment design and the pattern cutting process for your design(s) will begin.

Depending on the complexity of your garment design your pattern may take 1 - 3 days to be completed and delivered as a full size printable jpeg file via email.

Information I will need in order to start the pattern making process for your designs will include the following:

- fabric weight and type
- required seam width
- desire hem width
- desired garment fit
- intended garment closures if applicable
- size (as compliant with Butterick standard size charts)

I will also require an illustration, photo or drawing of the garment(s) for which you need patterns drafted for as well as a similar visual reference for the back of the garment and details regarding any unseen elements to be included in the pattern.

Once complete, I will email your pattern to you via the email address you've provided. You'll then be able to take your digital pattern file to your local print shop or print services to have them print out your garment pattern(s).

Aside from pattern cutting / drafting, I also provide pattern digitization and can convert your flat paper or fabric pattern to digital jpeg format so it can be converted into an accurate digitally reproduction with clean, consistent seam widths and identical, correctly placed notches.

If you are interested in this pattern cutting or digitization service or you have any questions please email me for more information at stylistwithacause@gmail.com


Friday, August 24, 2012

This PatternMaker Just Finished Reading Fashion Design Course By Steven Faerm


I've just got finished reading Fashion Design Course by Steven Faerm,  the BFA Director of New Yorks Fashion Design at Parsons The New School For Design.  As a patternmaker / aspiring designer and someone who has already read quite a few books on the fashion industry I hadn't actually realized how informative and insightful this book would be.  And when I got it in the mail,  between it's saturation with pictures and it's apparent thinness,  I felt it would just be a fun read about things I'd already read about fashion design.

I was dead wrong!

Where can I start?  Yes,  there is a lot of pictures,  but once you read the deceptively small amount of text that comes with them Steven Faerm shares a wealth of key advice and tips in so many areas:

- how to find,  use,  and combine different sources of inspiration
- the intricate chemistry and importance of preparing color and fabric stories
- the key purpose and creation of mood/inspiration boards for your collections and how to put them together
- how to easily develop numerous looks for a single cohesive collection
- how to compose your collection to maintain viewers' interest and why collections should include a selection of day to evening wear
- how and why to create a 'one stop shopping' element in your collection
- demystifies the incorporation of important marketability in your collection
- how to choose, use and combine textiles for a collection in unique,  imaginative and appropriate ways
- ideas regarding the interpretation of chosen inspiritions
- how to create a focus collection that isn't redundant
- and so much more

And the images and layout which clearly demonstrates the information provided in the text is very professional and very cool:


Although a few things, (a very few) were in it that I've read before, (and previously only very lightly covered in a fairly uninformative way),  Just about everything in this book is new,  in depth information for me and as for the small size,  what Steven Faerm has done was outline many, many ways to learn more about each aspect of the elements that go into designing a fashion collection.  He's also explained why each of these elements are so important in fashion design so that any aspiring designer will have a clear understanding of their creative responsibilities and exactly what they have to do to meet them.

If you're serious about fashion design,  you have to get this book. Following the assignments given in the book,  it's truly a surprisingly outstanding crash course in fashion design.  If you're an aspiring designer,  or you are already a designer,  you should read this book,  you should read this book,  you should read this book.  The only thing missing that could get you hired is the networking opportunities.

The one thing I would have liked to see in this book however,  is discussion of fashion design theory regarding the art and science of using proportion, and more discussion and illustration of design styling dealing with garment components (as in types of sleeves,  skirts,  necklines,  hem finishes,  style lines etc, etc).  That's why the bulk is missing,  but hey,  for that I can always get the book The Fashion Designer's Directory of Shape and Style: Over 500 Mix-And-Match Elements for Creative Clothing Design.  I just need to get either that book on patternmaking for lingerie or Chunman's book on patternmaking,  the portfolio skills one.  Because as a patternmaker first,  I need to specialize in what I'm doing here.  I've got to get a book on draping for patternmaking too.  I'm going to get Connie Amaden Crawford's book for that.


If you're interested in my digital pattern making service (at $35 per garment pattern) contact me at stylistwithacause@gmail.com or on my FaceBook page "Fashion Patternmaking And Design"

Want more information on the industry and online schools?  Check out my site at:
Budget Online Fashion Design Schools and Resources

Want to find some cool eco-friendly fabrics and more check out my resource page at:


If you would just like to order basic pattern blocks for bodice,  torso,  coat/jacket or skirt you can place an order for the size and kind you need here at  my fiverr gig Patternmaker 78, where I will draft a basic digital bodice or skirt pattern block in the size you require for $5

Monday, August 6, 2012

I've Got Pattern Making Work!

Wow,  this was some kind of day,  out of the blue,  I got a pattern client who happened to stumble across my blog.   She wants me to draft up the patterns for her line of childrens' clothing.   I had to draft up a size 5 children's bodice and sleeve to prepare for it,  fortunately,  even though my little girl is 3, she wears a size 5 so that's worked out just fine and I've got the size 5 blocks to start working on in the morning.

I want to see if I can complete a garment pattern a day for this lady.  As she does need them done by Friday,  I'll cross my fingers about the one pattern a day thing.  I love to do the three patterns that quickly. I may be getting more work from my hat pattern client too.

In all this strong prospective client thing going on,  it was kind of funny,  I wasn't able to finish those tweeks to my lemon tulip lingerie pattern again,  even though I hauled out my dress form and everything this morning.  Oh well,   maybe next weekend.  At least this time the thing that stopped me was patternmaking work :),  big    big plus there.   If I get a little extra time I'm going to email the other client of mine,  the design student over in New York,  see how she's been doing lately.


If you're interested in my digital pattern making service (at $35 per garment pattern) contact me at stylistwithacause@gmail.com or on my FaceBook page "Fashion Patternmaking And Design"

If you would just like to order basic pattern blocks for bodice,  torso,  coat/jacket or skirt you can place an order for the size and kind you need here at  my fiverr gig where I will draft a basic digital bodice or skirt pattern block in the size you require for $5

Want more information on the industry and online schools?  Check out my site at:
Budget Online Fashion Design Schools and Resources

Want to find some cool eco-friendly fabrics and more check out my resource page at:

Wednesday, August 1, 2012

Got My Fashion Design Book And Started My Pattern Revision

It's only Wednesday but a lot has happened this week to allow me to now actually have more time to work on my patternmaking and play with my kids more,  what a blessing.  See I got a sinus infection about a week ago,  and it was just getting worse,  till I looked up some herbs for it,  the three I started taking are cat's claw,  burdock and St John's Wort.

And what do you know?  Although it's been slow in treating my sinus infection,  it's brought my depression down to some positive side effects.  I can now quickly get my articles done in the morning,  with them only taking about 45 minutes a piece rather then 2 and 1/2 hours so I'm having time I haven't had in years and years.   It's like a miracle.   I recommend it to anyone who has any level of depression that your psychiatrist can't prescribe medicine for,  this herb is a God send.

Now for patternmaking,  I've been deciding to tie up loose ends with my pattern making stuff so this morning I checked out my basic bodice block, posted the image of the finished product on facebook and I've just finished a couple hours work on the revision for my lemon tulip lingerie pattern.  Next,  I'm going to do a couple extra blocks for the size 6 set of pattern blocks,  the jacket,  pant and skirt slopers.  Then I'll grade a set up to size 8.

After that though,  I think I really want to start working either on one of the designs in my personal collection,  or the other portfolio piece I designed (a light purple asymmetrical jacket and skirt set).  Then again,  although,  I like that portfolio piece,  I could use the one from my collection as my portfolio piece too.   I'll see how I feel about it later.

Now about the fashion design book I got from the book depository.  "Fashion Design Course" by Steven Faerm came in the mail on Monday and you know,  I'm just on the fifth section,  but I realize I should have gotten some books on specifically fashion design too rather then just getting all the other stuff,  portfolio development,   fashion illustration,  fashion designer's sewing secrets,  patternmaking and even how to survive as a fashion designer.  I actually made the mistake of thinking that fashion illustration and a book on how to make it as a fashion designer would basically cover everything that I'd need to know as a designer.  I was wrong though,

A book specifically about fashion design,  such as this one written by a leader in fashion design education (the director at Parsons,  no less) will cover history of fashion,  reasons why certain designers are so important,  why fashion changes as it does,  who controls it,  how and why.  The other things it covers are details in how a fashion designer works with other people,  such as the illustrators,  patternmakers and sample hands to create prototypes and so  on.  The responsibilities of the fashion designer are mapped out in great detail.

This book will also be teaching me about the different techniques designers use to develop collections,  like how to use inspiration around them,  how to combine things,  learn more about garment engineering and things like that.  I mean it's not to say I don't know anything about it already,  I do,  but I'll be learning so much more through this,  it'll open new doors and crystallize things I already have the right idea about. I'm hoping it'll cover a few extra 'designer' insights about patternmaking too though.


If you're interested in my digital pattern making service (at $35 per garment pattern) contact me at stylistwithacause@gmail.com or on my FaceBook page "Fashion Patternmaking And Design"

If you would just like to order basic pattern blocks for bodice,  torso,  coat/jacket or skirt you can place an order for the size and kind you need here at  my fiverr gig where I will draft a basic digital bodice or skirt pattern block in the size you require for $5

Want more information on the industry and online schools?  Check out my site at:
Budget Online Fashion Design Schools and Resources

Want to find some cool eco-friendly fabrics and more check out my resource page at:


Thursday, July 26, 2012

Butterick Size Compliant Bodice Pattern Block Completed All Sewn Up

Okay,  I wanted to find a nifty way to post both these images side by side so you could see them at the same time without scrolling.  Although my favorite thing to do is draft patterns and design clothes,  I do like finding great ways of using social media platforms as well and then sharing them with people.   If you'd like to know how to do this with your blogger photos, check it out at:  http://tips.blogdoctor.me/2007/10/tips-on-pictures-in-blogger.html

As I figured my pattern blocks turned out fine even though Butterick's size 6 measurements are 1/2 " off from  the ones for my dressform,  no biggy.   Now it's time for me to start making the torso blocks,  jacket/coat block and skirt blocks for this size and then grading it up or down for the other sizes,  actually,  I don't know what I want to do first there.  Maybe I'll grade it up and down a few times first,  just to review my pattern  grading book by Connie Amaden Crawford,  that book was worth the money just for a few of the key diagrams that are in there.

Front View Of Bodice Pattern
Side View Of Bodice Pattern


Speaking of books,  I'm really looking forward to my new ones coming from Alibris and The Book Depository,  I ordered "Fashion 101: a Crash Course in Clothing " a kind of history of fashion garments,  I know that's going to be a big inspiration as I love history too and the "Fashion Design Course: Principles, Practice, and Techniques: a Practical Guide for Aspiring Fashion" as my fashion design pick.   There's also a book of 600 designer elements and discussion of proportion and other proportion of design elements,  however before I order it I want to make sure it's not already covered in the design book that's coming.

So,  I'm going to streamline my book purchases by getting ones I think I can learn the most new,  most valuable stuff from,  rather then getting good books that cover information I've read already.  So I think my next book purchase will be either  "Pattern Cutting for Lingerie, Beachwear and Leisurewear"
by Ann Haggar or "Pattern Making" by Lo, Dennic Chunman which I've heard was a "holistic approach" to pattern cutting.  Apparently he's got stuff in there about John Galliano's pattern drafting techniques,  I can't wait to get my hands on that one.


As for when I make my next order,  I think I'm going to wait till the 20th of next month,  just to make sure I'm sticking with my budget and things because when you work as a freelancer,  you never know how the work flow is going to go.   Instead,  I'll just see how much pattern making stuff I can do and post in a bit of free time I may be getting over the next few days or so (if I'm lucky).

I've also been putting together an "Eco Friendly MakeUp Mall" on Pinterest,  to help prevent and raise awareness for breast cancer with all natural,  chemical and cruelty free cosmetics,  you can check it out here at: http://pinterest.com/ayisha1978/the-eco-friendly-makeup-mall/  and be sure to visit often for more product images/listings


If you're interested in my digital pattern making service (at $35 per garment pattern) contact me at stylistwithacause@gmail.com or on my FaceBook page "Fashion Patternmaking And Design"

If you would just like to order basic pattern blocks for bodice,  torso,  coat/jacket or skirt you can place an order for the size and kind you need here at  my fiverr gig where I will draft a basic digital bodice or skirt pattern block in the size you require for $5

Want more information on the industry and online schools?  Check out my site at:
Budget Online Fashion Design Schools and Resources

Want to find some cool eco-friendly fabrics and more check out my resource page at:


Wednesday, July 4, 2012

Surviving As A Self Taught Pattern Maker

Oh man,  patternmaking work is dry right now.  What happened?  Could this be a crashed economy thing happening?  Could this lack of work be simply because I don't have a great portfolio right now,  or could it just be because there's just so little money going around that designers that are just starting out can't afford to go forward themselves till things get a little better?   I hate wondering about that,  bad economy or not though,  I've got to keep going with my patternmaking work,  otherwise I'll never get anywhere with it.   I hope the economy improves,  not only is it scary for work to be so hard to get,  but it also sad that so many people,  all over the world are having it so bad right now,  it's frightening too.

I'm not one to live by my fears,  but the thought has crossed my mind more then once,  that maybe I'm doing all this for nothing because if the world gets to be a tougher place,  people aren't going to be too worried about designer clothes,  kind of like what happened in France during German occupation,  the Germans felt like French use of fabric and resources was a big waste so they stopped pretty much all fashion production,  design and all.  In fact, if it weren't for Arabs and their passion for dressing their princesses in the finest,  couture as we know it would have been dead long ago.  Because it was after German occupation that the Arabs successfully revived the industry through demand.  Interesting story there.   So who knows what could happen in the coming years. We could see a temporary 'death' of fashion and when the world completes this stage it's going through,  a new perspective and approach will take place in regards to fashion.  The "industry" is probably going to become completely redefined.   And the green movement will most likely play a major role in all of it.

I'm not just going to wait though,  I've got a game plan,  I'll always work on my patternmaking and fashion design,  no matter what,  even if there isn't any,  or much money in it,  however,  I've taken an animal care specialist course and will review it again if I need to get a job once both my kids are in school (that is if my patternmaking doesn't start bringing in more money by then).  And on an even more practical note,  if I do get work as a vet assistant,  I'll also take a course in Pharmaceutical assistant and a TEFL course (teaching English As A Foreign Language) so I'll be able to make money anywhere.

That's all about 2 years away though,  for now I'm just going to keep up what I'm doing here, struggling to not let my article work drown out my time as patternmaker and designer for the sake of living expenses.   I'm going to try and get a few books that will hopefully further my fashion related endeavors,  the first of which pretty much are number in the order I think I'll try to get them in:

1.  Fashion Design Course: Principles, Practice, and Techniques: the Practical Guide for Aspiring Fashion Designers by Faerm, Steven 

2.  Fashion 101: a Crash Course in Clothing by Stalder, Erika And Krietzman, Arie 

3.  The Fashion Designer's Directory of Shape and Style: Over 600 Mix-and-Match Elements for Creative Clothing Design (Barron's Educational) by Simon Travers-Spencer, Zarida Zaman 

4.  Pattern Cutting for Lingerie, Beachwear and Leisurewear by Ann Haggar (very important for some close fitting garments and special occasion wear,  not just undergarments)

5.  The Entrepreneur's Guide to Sewn Product Manufacturing by Kathleen Fasanella, Andree Conrad

6.  Pattern Cutting for Women's Tailored Jackets by Winifred Aldrich

Hope to be ordering some of them soon if I can, I'll cross my fingers.  As for what I've been doing lately outside of writing and family busy-ness,  I've recently opened up my FaceBook Page "Fashion Patternmaking And Design" were I'll be offering

-  my digital patternmaking services to anyone looking for a patternmaker (if you're interest just visit my page or email me at stylistwithacause@gmail.com)

-  basic block patterns in different standard sizes (Butterick's sizes that is) for designers and home sewers looking for something to start designing their own clothes with

-  and the patterns for my own designs as I get the time to develop them

I've also opened a basic pattern block drafting gig on Fiverr,  for anyone who needs a particular size basic block pattern,  here's the link: I will draft a basic digital bodice or skirt pattern block in the size you require for $5

And from now on each of my blog posts will end with all 4 of these links below:

If you're interested in my digital pattern making service (at $35 per garment pattern) contact me at stylistwithacause@gmail.com or on my FaceBook page "Fashion Patternmaking And Design"

If you would just like to order basic pattern blocks for bodice,  torso,  coat/jacket or skirt you can place an order for the size and kind you need here at  my fiverr gig where I will draft a basic digital bodice or skirt pattern block in the size you require for $5

Want more information on the industry and online schools?  Check out my site at:
Budget Online Fashion Design Schools and Resources


Want to find some cool eco-friendly fabrics and more check out my resource page at:


Saturday, June 23, 2012

Only The Buttons Left To Do On My Lemon Tulip Pattern

Okay,  I've got to fess up,  this post is a week late as I did all this work last weekend and simply wasn't able to write a post for the life of me due to housework.   It's a shame,  but here are the photos of my finished look. My only complaints about the finished design,  is that I think I should have made the waist and midriff band half the width (I just had to say that),  I wish there was at least an extra 1/2" of ease in the waistband and the sleeves,  although every bit as beautiful as I wanted them to be,  should have been a bit shorter by at least 2".  I'll be sure to put in all these tweaks when I re-work the pattern.


Other than that,  there are only the buttons left to put in and those are going to be the metal ball buttons.  I still liked them after I had the garments sewn up,  they're a little quirky for the design,  I know,  but I like them,  it fits anyway.  I'm not so sure about the lingerie part though actually,  lol,  after watching a few Tinkerbell movies,  great 3D movies there,  I think my design is more of a fairy costume,  so funny.  I'll have to do some serious lingerie another time, Oh hold it,  I had an idea for a piece a few months back,  I should work it out for my portfolio...!  Awesome idea there.  I think I want to do my jacket design anyway though.  Now to decide which one I'm going to work on first.   

It might have to wait till next weekend though because I've got a pile of dishes sitting in the kitchen (note,  I didn't restrict it to 'sink'  eeeck!)  and unfortunately my article writing suffered this week so I've got to make that up too.

I've got another confession to make as well,  out of all the "how to" fashion books I've read,  pattern making,  sewing secrets,  couture sewing,  designer details,  pattern grading and even various book on the fashion industry but .... after all is said and done,  I realized last week that I've never actually read a book on Fashion Design.  Isn't that crazy?   I've got to get another book on pattern making,  either dealing with women's suites,  specialty patternmaking or patternmaking for lingerie,  but my next book purchase will have to also include a book on Fashion Design,  as in the design process that goes into collection development.  I've already got a list of books I'm going to be picking from.

I'll have to choose between a book that focuses on the process itself from the perspective of a fashion school professor or another that focuses on the history of fashion design and the process.  (I'm a sucker for history so this is a tough choice).   Soon as I get my web cam up and running, or get a real camera,  I'll start making book reviews of all the cool books I've been reading,  or rather have read on fashion and patternmaking.

Any way,  I didn't eat anything yet since early this morning either so I better get busy with my non-fashion work for now :(


If you'd like to read more about fashion, information on the industry and online schools check out my site at:

If you're a designer or home sewer and you'd like to find some cool eco-friendly fabrics and more check out my resource page at:


Sunday, June 10, 2012

Only A Bit More Work Left On My Lemon Tulip Lingerie Pattern

Okay,  I've been letting depression getting the better of me,  but today I was a bit more victorious, putting aside everything to do a few hours work on my lemon tulip lingerie pattern for my portfolio.   I reminded myself this morning that when you're depressed an important thing to do is just conquer you fear by doing one of the things you're afraid of.   JUST DO IT!  Like in the 80s,  remember those days?  

Any way,  I sewed the curved/petal ends of the sleeves,  clipped and pressed the seams,  then went to work on the bodice waistband,  adjusting the length to fit the bodice's alterations I did a few weeks ago.  Turns out,  I had made it about in inch longer than I intended even if the pattern didn't need alteration.  A new rule to remember popped into my head at that point...that I better use CurveCalc to measure and compare all edges that are supposed to be sewn together,  I don't know what happened,  I think that when I was drafting the bodice's darts I must not have taken the amount out of what was needed for it's waistband.

I ended up having to make the center back seam anyway though and clipping the remaining additional amount away from the ends.  Everything turned out great though,  the sewing was a lot better than it was on my skirt as well.  Practice makes perfect.  The other thing to though,  that's always been on my side,  is whenever I'm not satisfied with my work,  I mull over it in my mind about how I should have done it and I'll do this over and over.  It seems to add to the actual practice I put in.  So now all I have to do is slip stitch in the wrong side of the waistband,  gather and sew in the sleeves then put in the buttons.  Then I'll be done :) . Here's a picture of the piece so far...

the waistband only needs to be slip-stitched in now


As for the buttons I'm thinking now that I want to use those light weight steel foil ball buttons.  I'm not going to be sure though till the other sewing is all done.

Now about my patternmaking portfolio,  I'm still thinking about what kind of pieces to put it together with.  So I was checking out JoeysPatterns.com of Joey Johannson freelance pattern making service,  taking a look at the kinds of pieces she put in her online portfolio called "photos of work".  She's got photos of the Dresses,  Jackets, Tops,  Skirts and Pants she did patterns for as they were worn on the runway,  beautiful shots.  As for the designs themselves,  they're a combination of simple to more complex pieces that demonstrate her ability to make a well fitting garment regardless of how many style lines needed to be drafted into the pattern.  

She's not a nobody either, she's worked for the likes of Betsy Johnson, Rebecca Taylor, LAMB, Alice and Olivia and many other big name designers.   A good example to model my own portfolio from.  She also included the flat sketches with the jackets she did.   I want to include design illustrations with mine though,  I think it reveals an ability to interpret a design better than a more blueprint flat sketch would.  Not to criticize her choices though,  I love her site,  her work and her story,   very inspiring.  If you'd like to check it out here's the link: http://www.joeyspatterns.com/

As for my own portfolio pieces, I've got to design something that illustrates those kind of skills, but doesn't require me to purchase anything other than what I have already.  Soon as I'm done with this I'll have to do some brainstorming about it.   Hmm,  that's kind of exciting...


If you'd like to read more about fashion, information on the industry and online schools check out my site at:

If you're a designer or home sewer and you'd like to find some cool eco-friendly fabrics and more check out my resource page at:


Sunday, June 3, 2012

What Buttons To Use On My Lemon Tulip Skirt And Other Considerations

Okay,  I'm faced with the decision of which buttons to use on my design.  I don't have that many and don't want to buy anything that isn't eco friendly.  So here are the following options I've got to choose from coming out of my old button can...

I love these buttons,  and there wouldn't actually be a decision to make if I had two more  smaller versions of these buttons,  but I only have two and one large crystal flower button.

I like these marble,  crystal buttons but they're a bit heavy for the fabric and don't quite suite the design or the fabric color.


These metal ball buttons are a little quirky for the design,  but there's something about the combination I like a lot,  can't quite put my finger on it

These buttons match and all,  but they don't add any character to the design and all though they're the right size and weight,  I don't care for them too much.

After all is said and done,  I think I'm going to actually finish the bodice portion of the lemon tulip look before I decide which buttons to use.

I've got to decide how I'm going to go about trimming down the ease for the bodice bands,  however,  and then transfer the changes to the digital pattern.  I'm going to make the digital changes later,  as for the actual fabric pieces with the interfacing sewn in and things,  hmm.  I don't actually want to cut into that.  If I sew a seam down the center I guess that could fix the problem but there'd be a bulk issue and a new seam.  Or,  I could figure the amount to take off the sides,  cut off the necessary amount,  while making sure to include seam allowance. That way I could preserve the center notch.  This means I'll be taking off 5/8" off each side seam of the bodice bands.

After that I'll have to stay stitch the double sided tulip sleeves after taking in 6/8" from the under arm seam I'll have to create.  If I sew this pattern up again,  it won't have that seam though.  I'll be putting in the gathering stitches too and prepare to sew the sleeves into a french seam.   Can't wait to see how the french seam is going to work with the double sided tulip sleeve.  I hope the shape and curve of the sleeve will turn out the way I wanted too.

As for the interior closures for the design,  I'm going to leave it to a couple pairs of hooks and eyes since they'll be out of sight.

Any comments and suggestions about the buttons I should use are welcome,  thanks.

If you'd like to read more about fashion, information on the industry and online schools check out my site at:

If you're a designer or home sewer and you'd like to find some cool eco-friendly fabrics and more check out my resource page at:


Sunday, May 27, 2012

My Lemon Tulip Skirt Only Needs A Button Or Two Now

I just managed to finish my lemon tulip skirt portion of my portfolio piece today,  I had to blind slip stitch the waistband to the wrong side of the skirt and then tack the hen facing to the inside of the skirt edge with the same blind slip stitch.  I have to say,  after seeing how it looks,  I think I change my mind about wanting a fine hand rolled hem instead.  I really like the way this turned out.  Take a look below...


my patternmaking and design portfolio piece

my patternmaking and design portfolio piece

I love the way it curves gently outward from the waist then tapers to a narrow opening at the hemline...just like a tulip.  So lovely.  Now,  I remember hearing on Fashion File,  years ago,  they were talking about one of John Galliano Couture collections for Dior had such fine craftsmanship,  but that it was done with such a fine hand "...the clothes didn't look beat up".  I was afraid that once I tacked down the facing to the inside of the skirt that it be weighted down and look overworked instead of looking like...a tulip,  but it turned out great.   Thank God.

 I just have decide on what kind of closure type I'm going to use.  In a Threads Magazine article,  I read that any kind of closure on lingerie should act as additional embellishment and treated like jewelry.   Okay,  I've got to look for the right buttons then and make sure I've got 4 altogether,  two for the skirt and two for the bodice piece.

When I'm finished with this portfolio piece though,  I mean the entire look,  not just this skirt,  I'm going to put up another Patternmaking ad and include my portfolio link,  I think I'll redo the url for that thing too,  it's not great for Google pick up with the words it's using now.   I think I'm going to offer my old deal again too,  4 patterns at $35 EUR each get the 5th one free.

On another note now though,  I've put together a Pinterest board in dedication to my mom who has passed away.   I haven't been able to think about much else lately,  it troubles me that not enough people got to know just how wonderful and loving my mom was.  She had an extremely well rounded range of interests and concerns for many things,  the kind of things that mattered.   I miss her very much and wanted to share what I could about her character.  Here is the link to the Pinterest I made for her:   http://pinterest.com/ayisha1978/all-about-mom/ and the photo of her that I'm going to use as the cover.


If you'd like to read more about fashion, information on the industry and online schools check out my site at:

If you're a designer or home sewer and you'd like to find some cool eco-friendly fabrics and more check out my resource page at:


Saturday, May 19, 2012

Patternmaking And Pattern Alteration On My Design


I sewed the scalloped neckline facing onto the bodice yesterday.  To all us sewing moms out there, who haven't done this sort of thing yet,  don't do it with a wiggly baby in your lap, it's not going to turn out the way you want it.  Big No No.  However,  here are a few "to do" notes, sew sharp curves very slowly,  think of machine stitching as taking one stitch at a time,  one stitch at a time,  stop and go,  stop and go.

The result will be a smoother stitching line,  greater symmetry.  I also lightly marked my stitching line this time to 'see' better what I was doing (See Below).  I also loosened up the pressure foot tension on my Singer sewing machine,  just wish it could have been lightened up even more,  as the fabric still wasn't as free to move as I would have liked (my make of machine only goes so far though).


I was thinking though,  this type of sewing is why it would be great to actually have a manual sewing machine still.

Once I did the fitting,  I realized it had too much ease,  here a few pictures to show it...

eeek!  too much ease in the pattern
I would need to distribute the ease take up evenly between the side seams,  front and back darts as well as between the bustline and midriff level so as not to through the pattern off balance.  So I took

3/8" from the side seams and 1/8" from each dart which is actually a total of 1" and 3/4" ease take up.  I'll have to take the changes to the midriff band as well.

Here are the results after I made the necessary pattern alterations...

pattern alterations made,  much better fit
Will have to adjust the armscye curves too... what to do about the bias cut sleeve pattern?   I didn't want to have a seam,  but I'll create 3/8" underarm seam without cutting it open.  I'll just clip it at the soft foldline and turn it inside out (as the  bias cut tulip sleeve was cut on a fold to prevent it from having a completely sewn sleeve hem).

If I had the money,  I would have made a muslin out of some organic cotton or something,  like I was supposed to,  totally you know?  But,  I didn't,  and I would also buy some additional fabric to make a new version because this light weight yellow damask fabric is so delicate.

I need proper pressing equipment too!

I was looking at a Calvin Klein collection afterwards though from back in 1991,  that was a good year,  miss those days, Check it out here from Fashion Channel on YouTube:


...and it had me thinking.   I may choose a simpler,  clean,  fitted cut for my next portfolio garment design.   After all is said and done, if a 'promotional' project is to ambitious before it has the proper backing (in either knowledge,  skill or finances) it can do more damage in a way, then the good. it will do.  But only in a way.

I've learned a lot though,  still on,  and it felt good to finally produce something from a pattern I drafted on the computer.  In the end,  it wasn't actually my computer drafting that was even the problem.  Everything was fine there,  I just didn't know how to draft that kind of pattern correctly (cropped midriff lingerie style garment)  and which finishing elements would work best for that kind of design.  That's why I'm going to be buying that lingerie book though, "Pattern Cutting for Lingerie, Beachwear and Leisurewear" by Ann Haggar.  I can't wait.

I really should have used a fine hand rolled hem along that scalloped edge,  I was just hoping to get a crisp clean edge with the faced hem,  next time I'll clip the hem allowance and roll it in place along a pre-sewn guideline.  That should work much better.  However,  I think I'd still like to use the facing approach with the neckline because I really like how it "stands" on the neckline,  see below...  I just love that.


So today,  I'm going to hopefully continue work on the skirt portion of this outfit,  that is if I'm able to get a little time.  I've got to take my kids out again to the park,  can't miss that,  especially not on a day like this.


If you'd like to read more about fashion, information on the industry and online schools check out my site at:

If you're a designer or home sewer and you'd like to find some cool eco-friendly fabrics and more check out my resource page at:


Friday, May 11, 2012

Serious Progress on my Patternmaking Portfolio

I can't remember if I posted a link to my Patternmaking Portfolio I just put up a while ago,  if I didn't here it is: https://sites.google.com/site/ayisha1978designerpatternmaker/home/work-i-ve-completed-for-my-gracious-clients

Really though,  I should adjust the seo in that url.  The slideshow is a result of patterns I've drafted for another designer's collection.  I've got 3 collections of my own I should work on.  However,  for the moment I've been working on my first,  self designed portfolio piece,  the lemon tulip lingerie design.  Yesterday I was able to sew the skirt sections together,  using beautiful french seams,  and attached the hem facing to it's scalloped edge then clipped and understiched the seam.  Then I sewed the bodice sections together and pinned on the neckline facing.   Here are the pictures:

clipping the scalloped facing seam

right side of the skirt's scalloped edge

pin the corners of your scalloped facing to match correctly

didn't have the right pressing equipment to do a professional
job,  however, by using the tip of the iron and making tiny
pressing movements the resulting scallop edge turned out
very nicely

My first french seam,  such a beautiful seam,  it is time consuming
though, extra pressing is required and seam trimming.  One of my
books suggested to sew the first seam 1/4" press,  close and sew
it into another 1/4" seam,  this would have been messy though.  With
a little more research in two other sewing books,  you clip the seam
to 1/8" and then sew it into a 1/4" seam,  this is the correct way.


the completed skirt section,  ready for gathering
into the waist band

However,  as nice as the sewing is going,  I've discovered a 'lack of experience' issue with the drafting of the midriff area of the bodice,  it's got more ease than I meant for it to have.  Now I know a secret I have to learn more about (I actually love this kind of thing) Here it is:  

When you do a typical draft of a regular shoulder to waist pattern,  there's a little bit of ease at the waist unless you take it out and it will fit nicely.  But... if you draft a bodice pattern that reached down some where below the bustline, you'll discover that due to the inverse curve of the human body in that area,  there's quite a bit more ease than you'd like in a garment that supposed to be close fitting.   This is a very important detail to know,  especially if you want design or draft patterns for empire waist garments,  midriff designs or bras.   I probably would have learned this had I gotten my hands on the lingerie pattern drafting book I want to get.

Anyway,  my bodice ends just under the bust and I'm going to do a double check to see if I need to adjust the entire side seam or just the underbust edge. If so I'll determine the amount to take from each side seam at the underarms and then check how much more needs to be taken up at the midriff edge.  What ever needs to be taken up at the midriff,  I'm going to divide by 6,  with an amount taken up by each of the 4 darts (2 in the back and 2 in the front) and an amount at each side. (Mind you,  pattern wise, it'll look like I only took half the amount from the side seam).  

Then I'll have to adjust the midriff band accordingly as well as the bias cut tulip sleeves and take all the adjustments to my pattern in CorelDraw 9.  I'll complete that with some fitting notes for lingerie.  It will help to crystalize all the information. 

As for the skirt fit,  I'm pretty sure it'll be fitting like I want,  since it's at the waist and all,  I just hope it's going to have a bit of puff I was hoping for,  we'll see.

If you'd like to read more about fashion, information on the industry and online schools check out my site at:

If you're a designer or home sewer and you'd like to find some cool eco-friendly fabrics and more check out my resource page at: