As I work on my pattern cutting work, (I've got a few clients at the moment after not actually having any for a while) I realize having gotten a bit rusty in a few areas has it's benefits of helping crystallize some key procedures that need to take place during the drafting of a pattern.
First, sometimes when you have a cool design to do for your designer, say you really like the style lines in the garment, you may be tempted to start drafting up the style lines on the pattern sloper before you take care of deciding the exact placement of where the silhouette and length lines should be. Don't do this, you'll make the pattern cutting a repetitive process of adjusting and re-adjusting as you re-tweek style lines to properly accommodate the designer's intended look.
Second, notches. When you've drafted the main pattern blocks for a garment, you may sometimes be tempted to start placing your notches in their corresponding places (don't put them on the center of any seam lines though, as pieces can get sewn upside down and miss-matched this way). This is not the right time to notch so don't fall for it. You've got to make sure you've decided on you facing shape lines( if you're using facings) and drafted the other attached but smaller pattern pieces first so that it's easier and quicker to place accurate notches, in all their correct places rather then having a couple notching and notch adjusting sessions.
Third, whenever possible do all similar work on your pattern as a single step in the over all process of drafting your pattern. This doesn't include measuring though (for example, when you draft a basic bodice pattern, you've got to measure the armscye to correctly check the curve on the sleeve block before preceding with anything else). However, when you've got your basic sloper set up for a design, do all the silhouette and length drafting first such as neckline depth, waistline placement, hems, sleeve lengths etc. Zipper and button plackets are next. Then place your style lines on each of the pieces. Then draft your facings, hem facings and hems lengths. In digital pattern making I create my facings by setting up a shaped line that will be used to 'cut' through a copy of the main pattern block so that the seams and shapes will be identical to the main garment block. However, I don't 'cut' the facing out till all the notching work is complete so that I can simply copy the notches as well as the facing pieces to eliminate double measuring of notch placements.
So when you're drafting up your patterns, keep these practical pattern cutting procedures in mind to speed up your work and help keep it more accurate as well. After all, accuracy is just about everything in pattern making. And as they say, time is money.
If you are interested in my discount digital pattern cutting or digitization service however, or you have any questions, please email me for more information at stylistwithacause@gmail.com or visit my Facebook page to learn more.
Showing posts with label pattern. Show all posts
Showing posts with label pattern. Show all posts
Thursday, November 8, 2012


Monday, September 10, 2012
In Need Of A Discount Digital Pattern Cutting Service?

If you are looking for a pattern
cutting services as in an individual who can provide you with
pattern drafting / pattern making skills to provide you with finished
garment patterns, and you're also looking for a discount, then
you've come to the right place.
Unlike other pattern makers I don't
charge the high fees for my discount digital pattern making services.
As a beginner in the industry, I will draft your clothing patterns
for only $35 per garment item, and include free alterations should
your pattern(s) need any adjustments.
The first step in my pattern
cutting service will include a free drafting of a basic bodice
pattern called a sloper, in the size or sizes you require, (
according to the Butterick standard size chart). Then the
appropriate blocks which are also completed free of charge will be
constructed for the given garment design and the pattern
cutting process for your design(s) will begin.
Depending on the complexity of your
garment design your pattern may take 1 - 3 days to be completed and
delivered as a full size printable jpeg file via email.
Information I will need in order to
start the pattern making process for your designs will include the
following:
- fabric weight and type
- required seam width
- desire hem width
- desired garment fit
- intended garment closures if
applicable
- size (as compliant with Butterick
standard size charts)
I will also require an illustration,
photo or drawing of the garment(s) for which you need patterns
drafted for as well as a similar visual reference for the back of the
garment and details regarding any unseen elements to be included in
the pattern.
Once complete, I will email your
pattern to you via the email address you've provided. You'll then
be able to take your digital pattern file to your local print shop or
print services to have them print out your garment pattern(s).
Aside from pattern
cutting / drafting, I also provide pattern digitization and
can convert your flat paper or fabric pattern to digital jpeg format
so it can be converted into an accurate digitally reproduction with
clean, consistent seam widths and identical, correctly placed
notches.
If you are interested in this pattern
cutting or digitization service or you have any questions please email me for more information at
stylistwithacause@gmail.com
Wednesday, August 1, 2012
Got My Fashion Design Book And Started My Pattern Revision
It's only Wednesday but a lot has happened this week to allow me to now actually have more time to work on my patternmaking and play with my kids more, what a blessing. See I got a sinus infection about a week ago, and it was just getting worse, till I looked up some herbs for it, the three I started taking are cat's claw, burdock and St John's Wort.
And what do you know? Although it's been slow in treating my sinus infection, it's brought my depression down to some positive side effects. I can now quickly get my articles done in the morning, with them only taking about 45 minutes a piece rather then 2 and 1/2 hours so I'm having time I haven't had in years and years. It's like a miracle. I recommend it to anyone who has any level of depression that your psychiatrist can't prescribe medicine for, this herb is a God send.
Now for patternmaking, I've been deciding to tie up loose ends with my pattern making stuff so this morning I checked out my basic bodice block, posted the image of the finished product on facebook and I've just finished a couple hours work on the revision for my lemon tulip lingerie pattern. Next, I'm going to do a couple extra blocks for the size 6 set of pattern blocks, the jacket, pant and skirt slopers. Then I'll grade a set up to size 8.
After that though, I think I really want to start working either on one of the designs in my personal collection, or the other portfolio piece I designed (a light purple asymmetrical jacket and skirt set). Then again, although, I like that portfolio piece, I could use the one from my collection as my portfolio piece too. I'll see how I feel about it later.
Now about the fashion design book I got from the book depository. "Fashion Design Course" by Steven Faerm came in the mail on Monday and you know, I'm just on the fifth section, but I realize I should have gotten some books on specifically fashion design too rather then just getting all the other stuff, portfolio development, fashion illustration, fashion designer's sewing secrets, patternmaking and even how to survive as a fashion designer. I actually made the mistake of thinking that fashion illustration and a book on how to make it as a fashion designer would basically cover everything that I'd need to know as a designer. I was wrong though,
A book specifically about fashion design, such as this one written by a leader in fashion design education (the director at Parsons, no less) will cover history of fashion, reasons why certain designers are so important, why fashion changes as it does, who controls it, how and why. The other things it covers are details in how a fashion designer works with other people, such as the illustrators, patternmakers and sample hands to create prototypes and so on. The responsibilities of the fashion designer are mapped out in great detail.
This book will also be teaching me about the different techniques designers use to develop collections, like how to use inspiration around them, how to combine things, learn more about garment engineering and things like that. I mean it's not to say I don't know anything about it already, I do, but I'll be learning so much more through this, it'll open new doors and crystallize things I already have the right idea about. I'm hoping it'll cover a few extra 'designer' insights about patternmaking too though.
If you're interested in my digital pattern making service (at $35 per garment pattern) contact me at stylistwithacause@gmail.com or on my FaceBook page "Fashion Patternmaking And Design"
If you would just like to order basic pattern blocks for bodice, torso, coat/jacket or skirt you can place an order for the size and kind you need here at my fiverr gig where I will draft a basic digital bodice or skirt pattern block in the size you require for $5
Want more information on the industry and online schools? Check out my site at:
Budget Online Fashion Design Schools and Resources
Want to find some cool eco-friendly fabrics and more check out my resource page at:
And what do you know? Although it's been slow in treating my sinus infection, it's brought my depression down to some positive side effects. I can now quickly get my articles done in the morning, with them only taking about 45 minutes a piece rather then 2 and 1/2 hours so I'm having time I haven't had in years and years. It's like a miracle. I recommend it to anyone who has any level of depression that your psychiatrist can't prescribe medicine for, this herb is a God send.
Now for patternmaking, I've been deciding to tie up loose ends with my pattern making stuff so this morning I checked out my basic bodice block, posted the image of the finished product on facebook and I've just finished a couple hours work on the revision for my lemon tulip lingerie pattern. Next, I'm going to do a couple extra blocks for the size 6 set of pattern blocks, the jacket, pant and skirt slopers. Then I'll grade a set up to size 8.
After that though, I think I really want to start working either on one of the designs in my personal collection, or the other portfolio piece I designed (a light purple asymmetrical jacket and skirt set). Then again, although, I like that portfolio piece, I could use the one from my collection as my portfolio piece too. I'll see how I feel about it later.
Now about the fashion design book I got from the book depository. "Fashion Design Course" by Steven Faerm came in the mail on Monday and you know, I'm just on the fifth section, but I realize I should have gotten some books on specifically fashion design too rather then just getting all the other stuff, portfolio development, fashion illustration, fashion designer's sewing secrets, patternmaking and even how to survive as a fashion designer. I actually made the mistake of thinking that fashion illustration and a book on how to make it as a fashion designer would basically cover everything that I'd need to know as a designer. I was wrong though,
A book specifically about fashion design, such as this one written by a leader in fashion design education (the director at Parsons, no less) will cover history of fashion, reasons why certain designers are so important, why fashion changes as it does, who controls it, how and why. The other things it covers are details in how a fashion designer works with other people, such as the illustrators, patternmakers and sample hands to create prototypes and so on. The responsibilities of the fashion designer are mapped out in great detail.
This book will also be teaching me about the different techniques designers use to develop collections, like how to use inspiration around them, how to combine things, learn more about garment engineering and things like that. I mean it's not to say I don't know anything about it already, I do, but I'll be learning so much more through this, it'll open new doors and crystallize things I already have the right idea about. I'm hoping it'll cover a few extra 'designer' insights about patternmaking too though.
If you're interested in my digital pattern making service (at $35 per garment pattern) contact me at stylistwithacause@gmail.com or on my FaceBook page "Fashion Patternmaking And Design"
If you would just like to order basic pattern blocks for bodice, torso, coat/jacket or skirt you can place an order for the size and kind you need here at my fiverr gig where I will draft a basic digital bodice or skirt pattern block in the size you require for $5
Want more information on the industry and online schools? Check out my site at:
Budget Online Fashion Design Schools and Resources
Want to find some cool eco-friendly fabrics and more check out my resource page at:
Sunday, June 10, 2012
Only A Bit More Work Left On My Lemon Tulip Lingerie Pattern
Okay, I've been letting depression getting the better of me, but today I was a bit more victorious, putting aside everything to do a few hours work on my lemon tulip lingerie pattern for my portfolio. I reminded myself this morning that when you're depressed an important thing to do is just conquer you fear by doing one of the things you're afraid of. JUST DO IT! Like in the 80s, remember those days?
Any way, I sewed the curved/petal ends of the sleeves, clipped and pressed the seams, then went to work on the bodice waistband, adjusting the length to fit the bodice's alterations I did a few weeks ago. Turns out, I had made it about in inch longer than I intended even if the pattern didn't need alteration. A new rule to remember popped into my head at that point...that I better use CurveCalc to measure and compare all edges that are supposed to be sewn together, I don't know what happened, I think that when I was drafting the bodice's darts I must not have taken the amount out of what was needed for it's waistband.
I ended up having to make the center back seam anyway though and clipping the remaining additional amount away from the ends. Everything turned out great though, the sewing was a lot better than it was on my skirt as well. Practice makes perfect. The other thing to though, that's always been on my side, is whenever I'm not satisfied with my work, I mull over it in my mind about how I should have done it and I'll do this over and over. It seems to add to the actual practice I put in. So now all I have to do is slip stitch in the wrong side of the waistband, gather and sew in the sleeves then put in the buttons. Then I'll be done :) . Here's a picture of the piece so far...
As for the buttons I'm thinking now that I want to use those light weight steel foil ball buttons. I'm not going to be sure though till the other sewing is all done.
Now about my patternmaking portfolio, I'm still thinking about what kind of pieces to put it together with. So I was checking out JoeysPatterns.com of Joey Johannson freelance pattern making service, taking a look at the kinds of pieces she put in her online portfolio called "photos of work". She's got photos of the Dresses, Jackets, Tops, Skirts and Pants she did patterns for as they were worn on the runway, beautiful shots. As for the designs themselves, they're a combination of simple to more complex pieces that demonstrate her ability to make a well fitting garment regardless of how many style lines needed to be drafted into the pattern.
She's not a nobody either, she's worked for the likes of Betsy Johnson, Rebecca Taylor, LAMB, Alice and Olivia and many other big name designers. A good example to model my own portfolio from. She also included the flat sketches with the jackets she did. I want to include design illustrations with mine though, I think it reveals an ability to interpret a design better than a more blueprint flat sketch would. Not to criticize her choices though, I love her site, her work and her story, very inspiring. If you'd like to check it out here's the link: http://www.joeyspatterns.com/
As for my own portfolio pieces, I've got to design something that illustrates those kind of skills, but doesn't require me to purchase anything other than what I have already. Soon as I'm done with this I'll have to do some brainstorming about it. Hmm, that's kind of exciting...
Any way, I sewed the curved/petal ends of the sleeves, clipped and pressed the seams, then went to work on the bodice waistband, adjusting the length to fit the bodice's alterations I did a few weeks ago. Turns out, I had made it about in inch longer than I intended even if the pattern didn't need alteration. A new rule to remember popped into my head at that point...that I better use CurveCalc to measure and compare all edges that are supposed to be sewn together, I don't know what happened, I think that when I was drafting the bodice's darts I must not have taken the amount out of what was needed for it's waistband.
I ended up having to make the center back seam anyway though and clipping the remaining additional amount away from the ends. Everything turned out great though, the sewing was a lot better than it was on my skirt as well. Practice makes perfect. The other thing to though, that's always been on my side, is whenever I'm not satisfied with my work, I mull over it in my mind about how I should have done it and I'll do this over and over. It seems to add to the actual practice I put in. So now all I have to do is slip stitch in the wrong side of the waistband, gather and sew in the sleeves then put in the buttons. Then I'll be done :) . Here's a picture of the piece so far...
 |
| the waistband only needs to be slip-stitched in now |
As for the buttons I'm thinking now that I want to use those light weight steel foil ball buttons. I'm not going to be sure though till the other sewing is all done.
Now about my patternmaking portfolio, I'm still thinking about what kind of pieces to put it together with. So I was checking out JoeysPatterns.com of Joey Johannson freelance pattern making service, taking a look at the kinds of pieces she put in her online portfolio called "photos of work". She's got photos of the Dresses, Jackets, Tops, Skirts and Pants she did patterns for as they were worn on the runway, beautiful shots. As for the designs themselves, they're a combination of simple to more complex pieces that demonstrate her ability to make a well fitting garment regardless of how many style lines needed to be drafted into the pattern.
She's not a nobody either, she's worked for the likes of Betsy Johnson, Rebecca Taylor, LAMB, Alice and Olivia and many other big name designers. A good example to model my own portfolio from. She also included the flat sketches with the jackets she did. I want to include design illustrations with mine though, I think it reveals an ability to interpret a design better than a more blueprint flat sketch would. Not to criticize her choices though, I love her site, her work and her story, very inspiring. If you'd like to check it out here's the link: http://www.joeyspatterns.com/
As for my own portfolio pieces, I've got to design something that illustrates those kind of skills, but doesn't require me to purchase anything other than what I have already. Soon as I'm done with this I'll have to do some brainstorming about it. Hmm, that's kind of exciting...
If you'd like to read more about fashion, information on the industry and online schools check out my site at:
If you're a designer or home sewer and you'd like to find some cool eco-friendly fabrics and more check out my resource page at: |
Sunday, June 3, 2012
What Buttons To Use On My Lemon Tulip Skirt And Other Considerations
Okay, I'm faced with the decision of which buttons to use on my design. I don't have that many and don't want to buy anything that isn't eco friendly. So here are the following options I've got to choose from coming out of my old button can...
 |
| I love these buttons, and there wouldn't actually be a decision to make if I had two more smaller versions of these buttons, but I only have two and one large crystal flower button. |
 |
| I like these marble, crystal buttons but they're a bit heavy for the fabric and don't quite suite the design or the fabric color. |
 |
| These metal ball buttons are a little quirky for the design, but there's something about the combination I like a lot, can't quite put my finger on it |
 |
| These buttons match and all, but they don't add any character to the design and all though they're the right size and weight, I don't care for them too much.
After all is said and done, I think I'm going to actually finish the bodice portion of the lemon tulip look before I decide which buttons to use.
I've got to decide how I'm going to go about trimming down the ease for the bodice bands, however, and then transfer the changes to the digital pattern. I'm going to make the digital changes later, as for the actual fabric pieces with the interfacing sewn in and things, hmm. I don't actually want to cut into that. If I sew a seam down the center I guess that could fix the problem but there'd be a bulk issue and a new seam. Or, I could figure the amount to take off the sides, cut off the necessary amount, while making sure to include seam allowance. That way I could preserve the center notch. This means I'll be taking off 5/8" off each side seam of the bodice bands.
After that I'll have to stay stitch the double sided tulip sleeves after taking in 6/8" from the under arm seam I'll have to create. If I sew this pattern up again, it won't have that seam though. I'll be putting in the gathering stitches too and prepare to sew the sleeves into a french seam. Can't wait to see how the french seam is going to work with the double sided tulip sleeve. I hope the shape and curve of the sleeve will turn out the way I wanted too.
As for the interior closures for the design, I'm going to leave it to a couple pairs of hooks and eyes since they'll be out of sight.
Any comments and suggestions about the buttons I should use are welcome, thanks.
If you'd like to read more about fashion, information on the industry and online schools check out my site at:
If you're a designer or home sewer and you'd like to find some cool eco-friendly fabrics and more check out my resource page at: |
Saturday, May 19, 2012
Patternmaking And Pattern Alteration On My Design
I sewed the scalloped neckline facing onto the bodice yesterday. To all us sewing moms out there, who haven't done this sort of thing yet, don't do it with a wiggly baby in your lap, it's not going to turn out the way you want it. Big No No. However, here are a few "to do" notes, sew sharp curves very slowly, think of machine stitching as taking one stitch at a time, one stitch at a time, stop and go, stop and go.
The result will be a smoother stitching line, greater symmetry. I also lightly marked my stitching line this time to 'see' better what I was doing (See Below). I also loosened up the pressure foot tension on my Singer sewing machine, just wish it could have been lightened up even more, as the fabric still wasn't as free to move as I would have liked (my make of machine only goes so far though).

I was thinking though, this type of sewing is why it would be great to actually have a manual sewing machine still.
Once I did the fitting, I realized it had too much ease, here a few pictures to show it...
 |
| eeek! too much ease in the pattern |
3/8" from the side seams and 1/8" from each dart which is actually a total of 1" and 3/4" ease take up. I'll have to take the changes to the midriff band as well.
Here are the results after I made the necessary pattern alterations...
 |
| pattern alterations made, much better fit |
If I had the money, I would have made a muslin out of some organic cotton or something, like I was supposed to, totally you know? But, I didn't, and I would also buy some additional fabric to make a new version because this light weight yellow damask fabric is so delicate.
I need proper pressing equipment too!
I was looking at a Calvin Klein collection afterwards though from back in 1991, that was a good year, miss those days, Check it out here from Fashion Channel on YouTube:
...and it had me thinking. I may choose a simpler, clean, fitted cut for my next portfolio garment design. After all is said and done, if a 'promotional' project is to ambitious before it has the proper backing (in either knowledge, skill or finances) it can do more damage in a way, then the good. it will do. But only in a way.
I've learned a lot though, still on, and it felt good to finally produce something from a pattern I drafted on the computer. In the end, it wasn't actually my computer drafting that was even the problem. Everything was fine there, I just didn't know how to draft that kind of pattern correctly (cropped midriff lingerie style garment) and which finishing elements would work best for that kind of design. That's why I'm going to be buying that lingerie book though, "Pattern Cutting for Lingerie, Beachwear and Leisurewear" by Ann Haggar. I can't wait.
I really should have used a fine hand rolled hem along that scalloped edge, I was just hoping to get a crisp clean edge with the faced hem, next time I'll clip the hem allowance and roll it in place along a pre-sewn guideline. That should work much better. However, I think I'd still like to use the facing approach with the neckline because I really like how it "stands" on the neckline, see below... I just love that.

So today, I'm going to hopefully continue work on the skirt portion of this outfit, that is if I'm able to get a little time. I've got to take my kids out again to the park, can't miss that, especially not on a day like this.
If you'd like to read more about fashion, information on the industry and online schools check out my site at:
If you're a designer or home sewer and you'd like to find some cool eco-friendly fabrics and more check out my resource page at:
Friday, May 11, 2012
Serious Progress on my Patternmaking Portfolio
I can't remember if I posted a link to my Patternmaking Portfolio I just put up a while ago, if I didn't here it is: https://sites.google.com/site/ayisha1978designerpatternmaker/home/work-i-ve-completed-for-my-gracious-clients
Really though, I should adjust the seo in that url. The slideshow is a result of patterns I've drafted for another designer's collection. I've got 3 collections of my own I should work on. However, for the moment I've been working on my first, self designed portfolio piece, the lemon tulip lingerie design. Yesterday I was able to sew the skirt sections together, using beautiful french seams, and attached the hem facing to it's scalloped edge then clipped and understiched the seam. Then I sewed the bodice sections together and pinned on the neckline facing. Here are the pictures:
However, as nice as the sewing is going, I've discovered a 'lack of experience' issue with the drafting of the midriff area of the bodice, it's got more ease than I meant for it to have. Now I know a secret I have to learn more about (I actually love this kind of thing) Here it is:
When you do a typical draft of a regular shoulder to waist pattern, there's a little bit of ease at the waist unless you take it out and it will fit nicely. But... if you draft a bodice pattern that reached down some where below the bustline, you'll discover that due to the inverse curve of the human body in that area, there's quite a bit more ease than you'd like in a garment that supposed to be close fitting. This is a very important detail to know, especially if you want design or draft patterns for empire waist garments, midriff designs or bras. I probably would have learned this had I gotten my hands on the lingerie pattern drafting book I want to get.
Anyway, my bodice ends just under the bust and I'm going to do a double check to see if I need to adjust the entire side seam or just the underbust edge. If so I'll determine the amount to take from each side seam at the underarms and then check how much more needs to be taken up at the midriff edge. What ever needs to be taken up at the midriff, I'm going to divide by 6, with an amount taken up by each of the 4 darts (2 in the back and 2 in the front) and an amount at each side. (Mind you, pattern wise, it'll look like I only took half the amount from the side seam).
Then I'll have to adjust the midriff band accordingly as well as the bias cut tulip sleeves and take all the adjustments to my pattern in CorelDraw 9. I'll complete that with some fitting notes for lingerie. It will help to crystalize all the information.
As for the skirt fit, I'm pretty sure it'll be fitting like I want, since it's at the waist and all, I just hope it's going to have a bit of puff I was hoping for, we'll see.
If you'd like to read more about fashion, information on the industry and online schools check out my site at:
If you're a designer or home sewer and you'd like to find some cool eco-friendly fabrics and more check out my resource page at:
Really though, I should adjust the seo in that url. The slideshow is a result of patterns I've drafted for another designer's collection. I've got 3 collections of my own I should work on. However, for the moment I've been working on my first, self designed portfolio piece, the lemon tulip lingerie design. Yesterday I was able to sew the skirt sections together, using beautiful french seams, and attached the hem facing to it's scalloped edge then clipped and understiched the seam. Then I sewed the bodice sections together and pinned on the neckline facing. Here are the pictures:
 |
| clipping the scalloped facing seam |
 |
| right side of the skirt's scalloped edge |
 |
| pin the corners of your scalloped facing to match correctly |
 |
| didn't have the right pressing equipment to do a professional job, however, by using the tip of the iron and making tiny pressing movements the resulting scallop edge turned out very nicely |
 |
| My first french seam, such a beautiful seam, it is time consuming though, extra pressing is required and seam trimming. One of my books suggested to sew the first seam 1/4" press, close and sew it into another 1/4" seam, this would have been messy though. With a little more research in two other sewing books, you clip the seam to 1/8" and then sew it into a 1/4" seam, this is the correct way. |
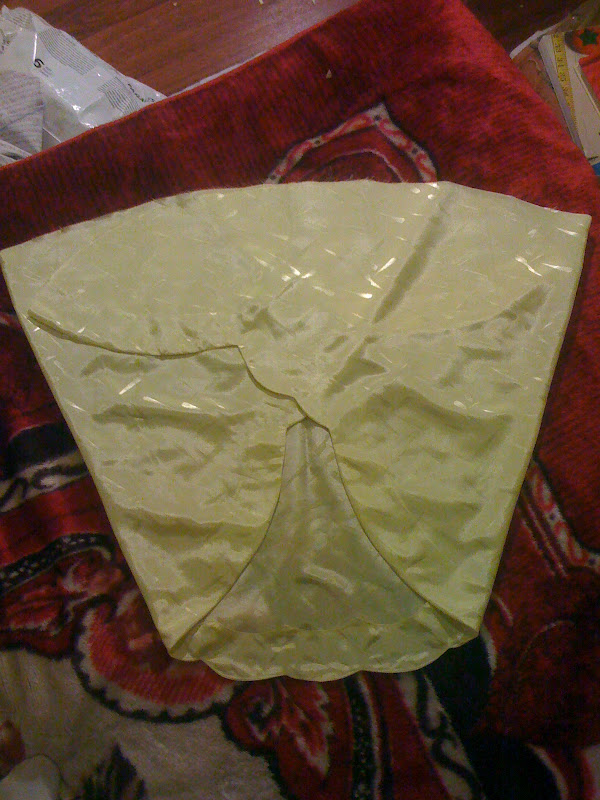 |
| the completed skirt section, ready for gathering into the waist band |
However, as nice as the sewing is going, I've discovered a 'lack of experience' issue with the drafting of the midriff area of the bodice, it's got more ease than I meant for it to have. Now I know a secret I have to learn more about (I actually love this kind of thing) Here it is:
When you do a typical draft of a regular shoulder to waist pattern, there's a little bit of ease at the waist unless you take it out and it will fit nicely. But... if you draft a bodice pattern that reached down some where below the bustline, you'll discover that due to the inverse curve of the human body in that area, there's quite a bit more ease than you'd like in a garment that supposed to be close fitting. This is a very important detail to know, especially if you want design or draft patterns for empire waist garments, midriff designs or bras. I probably would have learned this had I gotten my hands on the lingerie pattern drafting book I want to get.
Anyway, my bodice ends just under the bust and I'm going to do a double check to see if I need to adjust the entire side seam or just the underbust edge. If so I'll determine the amount to take from each side seam at the underarms and then check how much more needs to be taken up at the midriff edge. What ever needs to be taken up at the midriff, I'm going to divide by 6, with an amount taken up by each of the 4 darts (2 in the back and 2 in the front) and an amount at each side. (Mind you, pattern wise, it'll look like I only took half the amount from the side seam).
Then I'll have to adjust the midriff band accordingly as well as the bias cut tulip sleeves and take all the adjustments to my pattern in CorelDraw 9. I'll complete that with some fitting notes for lingerie. It will help to crystalize all the information.
As for the skirt fit, I'm pretty sure it'll be fitting like I want, since it's at the waist and all, I just hope it's going to have a bit of puff I was hoping for, we'll see.
If you'd like to read more about fashion, information on the industry and online schools check out my site at:
If you're a designer or home sewer and you'd like to find some cool eco-friendly fabrics and more check out my resource page at:
Sunday, April 22, 2012
The Patternmaker Needs To Get Good At Sewing (For Their Own Sake)
Weekends should always be devoted to your family (in addition to the time you set aside during the week for your family as well) but if you're going to do something for your business/career you should focus on those activities that don't necessarily make you any money right away but will help bring your career or business forward. My personal example being my lemon tulip lingerie pattern. I started sewing it today, little machine sewing, little hand stitching.
The first thing I'm working on is getting the facings and waist and bodice band together. My past experience has been that small pieces get lost or damaged if you've got kids and pets so I'm avoiding the problem totally by hanging these sewn up sections on a hanger. As for protecting my other work on the ironing board, I've covered it all up with a blanket to keep my cats from putting pulls in my work.
I've started catchstitching the self fabric interfacing to the back bodice band already (see photo below)

1. being able to sew up your own patterns will crystalize several things:
(a) where the notches need to be when you get confused
(b) how much fabric a design actually needs
(c) the fit resulting from your approach to drafting
2. if your pattern turns out well, you'll have full confidence in the product/service you're offering, you won't think it fit because you applied your knowledge of pattern drafting as well as you could, but you KNOW your pattern is accurate. This is confidence for a patternmaker.
3. Confidence results in taking less time to do your work simply because your not hesitating any more about whether or not your making the right move.
Aside from all this perfection though, I've got to make mention of how important is is not to be a perfectionist, at least not right away. My mom taught me how to sew and went a long way in inspiring me when it comes to fashion. However, she was a self proclaimed "non-perfectionist" which was good for me because it allowed me not to be quite so intimidated by the lengthy process of garment design, development and construction. Chances are, if she had enforced perfection, I might not have took this career path.
Case in point, I took my perfectionist attitude to my art and I didn't get nearly as far in developing my skills as an artist as I did in patternmaking and fashion design. To this day I'm still intimidated by the thought of picking up a brush or pencil. Although I do intend to overcome with this when I get the time.
The first thing I'm working on is getting the facings and waist and bodice band together. My past experience has been that small pieces get lost or damaged if you've got kids and pets so I'm avoiding the problem totally by hanging these sewn up sections on a hanger. As for protecting my other work on the ironing board, I've covered it all up with a blanket to keep my cats from putting pulls in my work.
I've started catchstitching the self fabric interfacing to the back bodice band already (see photo below)

and it had me reflecting on what Kathleen Fasenella said "a patternmaker should have exceptional sewing skills". It's true for the benefit of both the clients in need of patternmaking services and the patternmakers themselves. Speaking as an entry level patternmaker making money from providing this service I understand the reasons for this are:
1. being able to sew up your own patterns will crystalize several things:
(a) where the notches need to be when you get confused
(b) how much fabric a design actually needs
(c) the fit resulting from your approach to drafting
2. if your pattern turns out well, you'll have full confidence in the product/service you're offering, you won't think it fit because you applied your knowledge of pattern drafting as well as you could, but you KNOW your pattern is accurate. This is confidence for a patternmaker.
3. Confidence results in taking less time to do your work simply because your not hesitating any more about whether or not your making the right move.
Aside from all this perfection though, I've got to make mention of how important is is not to be a perfectionist, at least not right away. My mom taught me how to sew and went a long way in inspiring me when it comes to fashion. However, she was a self proclaimed "non-perfectionist" which was good for me because it allowed me not to be quite so intimidated by the lengthy process of garment design, development and construction. Chances are, if she had enforced perfection, I might not have took this career path.
Case in point, I took my perfectionist attitude to my art and I didn't get nearly as far in developing my skills as an artist as I did in patternmaking and fashion design. To this day I'm still intimidated by the thought of picking up a brush or pencil. Although I do intend to overcome with this when I get the time.
If you'd like to read more about fashion, information on the industry and online schools check out my site at:
If you're a designer or home sewer and you'd like to find some cool eco-friendly fabrics and more check out my resource page at:
Tuesday, April 17, 2012
I dedicate everything to my mom

My parents had a sudden divorce several years ago after being together around 31 years, in the end it didn't work out and my mom left to live out on the prairies again. I was always very close to my mom but this situation seemingly evaporated our active closeness to the point where months would go by, even a year and she never called. I had to find her number through a bit of investigation. The guy she was living with couldn't even keep the phone lines open.
She never even got the chance to see her little grand daughter, my daughter Salma and her grandson all grown up into a big almost 5 year old boy. Before she let me know that she was leaving my father, I had a dream that I had lost her, she was beside me one minute and was gone the next after telling me she'd meet up with me outside the building to go home. When I looked for her she wasn't there...in the dream I had the unmistakable feeling that I'd just completely lost her.
And here I was, this morning, looking over the work I'd started, after this terrible phone call. I wouldn't have been into this work, atleast it wouldn't have been as ingrained in me if it hadn't been for my mom. She'd take me to the fabric and pattern department in Woodwards department store downtown back in the 80s and we'd be there for hours looking through pattern books and searching for just the right fabric.
She would get a pattern, cut it out, lay it out on the living room floor and I'd watch her put everything together into a beautiful garment. I was always facinated by this and wanted to learn the secrets of why the pattern pieces where shaped the way they were. She'd sew them on her shiny black and gold enameled Singer sewing machine. As she turned the wheel, it would sound like a tiny train. She put me on the path I'm on today.
She always talked about making the world a better place, helping both people and animals in whatever way was needed and protecting the environment out of the sincere love for everything that God created. She talked about these things as long as I can remember. I loved that about my mom. I loved that about my mom. I always wanted to be like her, but go a step up and be able to make her dreams a reality. To make an impact, a growing one, throughout my life so that I leave the world as a better place than when I came into it. So the world's children and other innocent creatures will be able to face a safer, brighter future than the one I thought I was facing.
Everything I do in my life, every success and difference that I am able to make, I dedicate to my mom. The beautiful spirit that nourished and cared for the best in me. I'm setting out to fulfill your dreams mom and try to raise my children to be the way you wanted me to be. I love you with all my heart. And I'm sorry for the misunderstanding between us that happened after you left.
Thursday, April 12, 2012
The Patternmaker's Update: It's Been A Crazy Week
Okay, so on our holiday weekend I'd planned to get my first portfolio piece completed, I was raring to go and then I sat at the sewing machine to figure out stitch length and thread tension that would work for this beautiful but thin and slippery fabric I want to sew the lemon tulip lingerie pattern out of and...
The little rubber wheel that creates the traction necessary for new bobbin thread to be wound around a bobbin had melted into a gross black goo around the wheel it was supposed to be on. And that wasn't all, there was a piece of broken plastic from the socket that held the top thread spool, so there was only one thing left to do. Open her up and see if I could fix the problem(s). I'd found a crayon in the machine as well as the clip of marker top, my daughter's doing for sure.
I've fixed a sewing machine I had before, several times, with success. And I also repaired a scroll saw, on my own, again with success. I took time and patients and all but I did it so I had no inhibitions about opening up this Brother sewing machine and seeing if I could get it up and running again. Well after all was said and done, with an attempt to fit the wheel with a quintupled rubberband and then when I decided it wouldn't work because it was getting shredded, I headed for the toy box in search of a little car. Have you ever seen them? Little hard black rubber wheels, they might have been just the thing I needed, I did find one, and I did fit 2 of the cars wheels on the bobbin mechanism, but when I tried to run the machine, they too began to melt. Yuck, you know? Okay, so maybe the Brother company has the right wheel...I'll just have to email them, I thought.
Then, the needle bar somehow got misaligned too, so that the needle completely missed the bobbin case. No luck at all trying to figure that one out. I did what I always do, compare adjacent pieces, look for what looks like it's fitted wrong, was there something sitting in the plastic case the wrong way? Nothing made any sense. Why did this time have to be a problem I couldn't fix?
WELL, my husband came to my rescue and told me he'd get a new on for me on Monday, which he did along with a new computer to replace this beat up HP laptop that's been giving me a hard time. He's been watching me work on these computer patterns and get article projects done and realized I'm dead serious about what I'm into so he's offered his loving support and got me a beautiful new Singer sewing machine and a cool new Acer computer.
So I've been setting up the computer with all the programs and things I use to work and getting a new client's pattern completed (I actually just sent it off a few minutes ago). It was my very first corset pattern for a designer in Saudi Arabia. I hope they keep me on as a client. It takes me a little longer to do work for a new client because I usually need to first prepare a brand new sloper for them from scratch, they don't give me one. I'm not sure why, I guess they don't know about it. I did hear that companies and designers are supposed to provide the patternmaker with the sloper in the size they want though.
Any while doing a bit of research this week also had me discover the reason behind the necessity of perfection in a patternmaker's work. Thought it was just a pickiness thing? Think again. A person familiar with home sewing could easily make this mistake (I did for a while and I am a perfectionist) but the thing about homesewers, as Kathleen Fasanella puts it, " homesewers expect too much from themselves" they're highly skilled, where as the people working in a factory are not and don't need to be. This is why the pattern has to be perfect, flawless without so much as a 1/32 of an inch mistake, yes I'm not kidding you, don't even allow yourself a 1/32 of an inch mistake.
Because, the people working the factory sewing machines only have a small part of the garment to sew and they may not be aware how everything else is supposed to fit together they also won't know if something is a little off. And the mistake will go from one person to the next, no one knowing how to fix the problem, with chances being that the one mistake will cause additional mistakes and you'll end up with imperfect garments. The horror. And everyone will know it was your fault, you are the one who made a mistake!
Any way, how do you solve/prevent this problem all together, simple, when you're working on the computer, (God bless these things) set your nudge distance to 0.031 (this is the 1/32" I was talking about) and work under a microscope, in CorelDraw 9 for example, this means zooming in till 1" is about 5" or 6" on the screen. Make sure all your points, lines and curves match up everywhere under this "microscope" and remind yourself that this attention to detail is what will set you apart from the rest.
And just for the sake of reference, should any of you be using CorelDraw 9 to draft patterns, like myself, when you've powerclipped something into a 'container' to be able to cut it up into separate, perfect panels, make sure your cutting path ( this can be a straight or shaped line) isn't closed. If it is a closed path for some reason the interior of this path gets rid of the pattern piece you're trying to slice through.
Okay, so now I've got another dress pattern to do for my client in New York and I have to watch the dvd that came with the Singer sewing machine so I can start sewing with it fairly quick. Maybe this weekend, I'm hoping, unless something else comes up. But my deadline is either by the end of this month of April, or at the very least the first week or two of May.
The little rubber wheel that creates the traction necessary for new bobbin thread to be wound around a bobbin had melted into a gross black goo around the wheel it was supposed to be on. And that wasn't all, there was a piece of broken plastic from the socket that held the top thread spool, so there was only one thing left to do. Open her up and see if I could fix the problem(s). I'd found a crayon in the machine as well as the clip of marker top, my daughter's doing for sure.
I've fixed a sewing machine I had before, several times, with success. And I also repaired a scroll saw, on my own, again with success. I took time and patients and all but I did it so I had no inhibitions about opening up this Brother sewing machine and seeing if I could get it up and running again. Well after all was said and done, with an attempt to fit the wheel with a quintupled rubberband and then when I decided it wouldn't work because it was getting shredded, I headed for the toy box in search of a little car. Have you ever seen them? Little hard black rubber wheels, they might have been just the thing I needed, I did find one, and I did fit 2 of the cars wheels on the bobbin mechanism, but when I tried to run the machine, they too began to melt. Yuck, you know? Okay, so maybe the Brother company has the right wheel...I'll just have to email them, I thought.
Then, the needle bar somehow got misaligned too, so that the needle completely missed the bobbin case. No luck at all trying to figure that one out. I did what I always do, compare adjacent pieces, look for what looks like it's fitted wrong, was there something sitting in the plastic case the wrong way? Nothing made any sense. Why did this time have to be a problem I couldn't fix?
WELL, my husband came to my rescue and told me he'd get a new on for me on Monday, which he did along with a new computer to replace this beat up HP laptop that's been giving me a hard time. He's been watching me work on these computer patterns and get article projects done and realized I'm dead serious about what I'm into so he's offered his loving support and got me a beautiful new Singer sewing machine and a cool new Acer computer.
So I've been setting up the computer with all the programs and things I use to work and getting a new client's pattern completed (I actually just sent it off a few minutes ago). It was my very first corset pattern for a designer in Saudi Arabia. I hope they keep me on as a client. It takes me a little longer to do work for a new client because I usually need to first prepare a brand new sloper for them from scratch, they don't give me one. I'm not sure why, I guess they don't know about it. I did hear that companies and designers are supposed to provide the patternmaker with the sloper in the size they want though.
Any while doing a bit of research this week also had me discover the reason behind the necessity of perfection in a patternmaker's work. Thought it was just a pickiness thing? Think again. A person familiar with home sewing could easily make this mistake (I did for a while and I am a perfectionist) but the thing about homesewers, as Kathleen Fasanella puts it, " homesewers expect too much from themselves" they're highly skilled, where as the people working in a factory are not and don't need to be. This is why the pattern has to be perfect, flawless without so much as a 1/32 of an inch mistake, yes I'm not kidding you, don't even allow yourself a 1/32 of an inch mistake.
Because, the people working the factory sewing machines only have a small part of the garment to sew and they may not be aware how everything else is supposed to fit together they also won't know if something is a little off. And the mistake will go from one person to the next, no one knowing how to fix the problem, with chances being that the one mistake will cause additional mistakes and you'll end up with imperfect garments. The horror. And everyone will know it was your fault, you are the one who made a mistake!
Any way, how do you solve/prevent this problem all together, simple, when you're working on the computer, (God bless these things) set your nudge distance to 0.031 (this is the 1/32" I was talking about) and work under a microscope, in CorelDraw 9 for example, this means zooming in till 1" is about 5" or 6" on the screen. Make sure all your points, lines and curves match up everywhere under this "microscope" and remind yourself that this attention to detail is what will set you apart from the rest.
And just for the sake of reference, should any of you be using CorelDraw 9 to draft patterns, like myself, when you've powerclipped something into a 'container' to be able to cut it up into separate, perfect panels, make sure your cutting path ( this can be a straight or shaped line) isn't closed. If it is a closed path for some reason the interior of this path gets rid of the pattern piece you're trying to slice through.
Okay, so now I've got another dress pattern to do for my client in New York and I have to watch the dvd that came with the Singer sewing machine so I can start sewing with it fairly quick. Maybe this weekend, I'm hoping, unless something else comes up. But my deadline is either by the end of this month of April, or at the very least the first week or two of May.
If you'd like to read more about fashion, information on the industry and online schools check out my site at:
If you're a designer or home sewer and you'd like to find some cool eco-friendly fabrics and more check out my resource page at:
Friday, April 6, 2012
Sewing Your Own Digital Pattern You Drafted, Printed And Cut Out
I cut my lemon tulip lingerie pattern out yesterday and looked it over, going about the task of sewing it in my mind (yes I'm a little apprehensive, I haven't sewn in a while, about 2 years and don't know how well my machine is going to handle the work). Aside from that though, working with a pattern you've drafted yourself is an indispensable learning experience and this won't be the only time I do it. I'm going to sew my own samples once I get started.
So what did I learn about patternmaking for this exercise so far? Okay, 2 things at this time: Take a look at the picture below of my pattern's sleeve pattern...


So, now, I'm going to take the little bit of fabric I took off the ends of this material and figure out which stitch length, thread tension and thread size to use. I'm thanking God that I won't have any top stitching to do because I don't have any yellow thread. I'll have to use one of my white threads. All the edging and hem work to do is going to be faced for a clean smooth edge. I'm thinking about blind stitching the facing to the garment if necessary though.
Oh, yeah, I also have to cut out the pattern blocks. I don't want to tailor tack the darts though as I don't want the fabric marred, so I'm going to make a piece of graphite paper and trace the interior of the darts onto the fabric, lightly though so it won't show up in the finished garment.
Also, because I want everything to turn out perfect, I'm making this an industrial sewing exercise, I've got my books out and open to make sure:
- all the seams are sewn in the right direction in orientation to fabric grain and garment block
- all seams are graded to the correct width
- everything will be pressed properly
- and all the right finishes are applied
This little project may take me a while to finish though as, hey I'm scared, but I love this project so much, I got to do it, but I want to do it totally right.
I'll be keeping you posted
So what did I learn about patternmaking for this exercise so far? Okay, 2 things at this time: Take a look at the picture below of my pattern's sleeve pattern...

1. Most of the cap on the finished sleeve to this to-be bias cut block is going to be gathered to hopefully create a bit of a "puff" to enhance the tulip shape. So; The area to be gathered should be marked from beginning to end, and in this case with the top of the sleeve cap being notched on both sides of the sleeve overlap. And oh oh, I forgot the little arrows at the ends of my bias grainline. And where are my annotations? Ughhh, well, the patterns I did for my client have been getting a lot more professional since I did this one a while back, so I won't get too mad at myself.
Next lesson:

Take a look at the original pattern this sleeve was drafted from. Because the spread from the central underarm area isn't spread evenly (see the highest notch on either side nearest the center of the underarm), with the difference in the degree of the spread between the front and back of the sleeve cap, there will be an uneven ratio of fabric to gather. One side is about 8" and need to be gathered to 4 1/8" and the other side is 5 inches and need to be gather to about 3". Next time I'll know better. So the rule is this, make sure there's a uniform distance between each spread so your gathers will also be uniform. I do think I read this before, but now it's definitely crystallized...nothing like hands on you know.
Now, I spent the morning preparing for my first portfolio piece. I want to get everything right, so I pulled out all my sewing books, organized my sewing equipment, dug up some old sewing machine needles, cleaned my sewing machine, pulled out my lovely fabric and ironed out all it's creases (see the photo below, I didn't buy this non-eco fabric, however, it was given to me about 15 years ago and I never knew what to do with it till now)
Photography tip here, to take a beautiful shot of a piece of satin jacquard hang it off of something and put another light source on it to show off it's double textures and shine.

So, now, I'm going to take the little bit of fabric I took off the ends of this material and figure out which stitch length, thread tension and thread size to use. I'm thanking God that I won't have any top stitching to do because I don't have any yellow thread. I'll have to use one of my white threads. All the edging and hem work to do is going to be faced for a clean smooth edge. I'm thinking about blind stitching the facing to the garment if necessary though.
Oh, yeah, I also have to cut out the pattern blocks. I don't want to tailor tack the darts though as I don't want the fabric marred, so I'm going to make a piece of graphite paper and trace the interior of the darts onto the fabric, lightly though so it won't show up in the finished garment.
Also, because I want everything to turn out perfect, I'm making this an industrial sewing exercise, I've got my books out and open to make sure:
- all the seams are sewn in the right direction in orientation to fabric grain and garment block
- all seams are graded to the correct width
- everything will be pressed properly
- and all the right finishes are applied
This little project may take me a while to finish though as, hey I'm scared, but I love this project so much, I got to do it, but I want to do it totally right.
I'll be keeping you posted
If you'd like to read more about fashion, information on the industry and online schools check out my site at:
If you're a designer or home sewer and you'd like to find some cool eco-friendly fabrics and more check out my resource page at:
Thursday, February 23, 2012
Secrets Of How To Expand Your Patternmaking Skills
Okay, I've read the best book on patternmaking by Connie Amaden Crawford, and it's a good one, better than the first one I bought. However, once you're "in the field" and dealing with clients, you learn something real fast...you didn't learn everything you need to know. Not by a long shot. Clients will always ask you for something that will be undiscovered territory for you, be it a bra, or tailored suit or, oh horrors (just kidding) an unusual size. Okay so here's what you do.
1. first of all get real practice in, you'll learn soon enough that you want more educational resources
2. even though pattern grading and alterations are actually different job descriptions, as in people get paid to these things, like only those things, as a patternmaker, it would seriously behove you to learn them, and quickly
3. think specialization and seek out the available resources, I'll get specific here
(a) there's a chance someone will want a tailored suit, find books on patterncutting, patternmaking for tailored suites, you need to do lingerie patterns for another client, hurry up and find a book on patternmaking for lingerie, not sewing lingerie, patternmaking for lingerie, this will have more info on what you need where as the sewing type instruction book will have those less fitted designs you could have drafted on your own any way, that's not what your clients are asking for
(b) clients sometimes ask for their own size, they're fashionista designers and they fit into tiny clothes but they aren't the exact size of industry fit models so you need to learn pattern alterations, another reason for this, if a client is in a niche size market, say for a really big cup size and shape, then you'll definitely need pattern alteration skills, go to Amazon and look up pattern alteration books and dvds. Also do a google search for pattern alterations, you'll find ideas on people's blogs, there are a lot of them, as well as books, classes, dvds, see what people are saying before you spend your money though.
(c) definietly get a book on grading, clients don't ask for one little size, your clients will ask for all kind of sizes and the reason you want to know how to grade corrrectly is because you'll need and want to know how to take the basic bodice you know is a perfect fit and grade it into a perfect bodice of another size without serious fitting issues for your new clients.
Speaking of which, I've just ordered Connie Amaden Crawford's Pattern Grading workbook and can't wait to get it, to be sure. I've looked up grading info online and learnt some great stuff, but I don't really have the confidence I need to know, that I know what I'm doing for sure, I just have the courage to keep going. There's a difference, believe me.
Okay, I hope all you fellow aspiring patternmakers out there have found this at least somewhat enlightning. Also, as I collect more educational resources, books and dvds, I'll post the reviews of them here on my blog too. So be sure to come back again.
Good news is too, I was finally able to get through the Squidoo so that I can start editing and publishing changes on my lenses again, so hopefully between my current patternmaking client and article client I'll find a few moments here and there to update my two fashion lenses. Or I might leave it for a few weeks still. I'll make it easy and post announcements here for you guys.
If you'd like to read more about fashion, information on the industry and online schools check out my site at:
Budget Online Fashion Design Schools and Resources
If you're a designer or home sewer and you'd like to find some cool eco-friendly fabrics and more check out my resource page at:
The Eco-Friendly Fashion Designer's Resource Page
1. first of all get real practice in, you'll learn soon enough that you want more educational resources
2. even though pattern grading and alterations are actually different job descriptions, as in people get paid to these things, like only those things, as a patternmaker, it would seriously behove you to learn them, and quickly
3. think specialization and seek out the available resources, I'll get specific here
(a) there's a chance someone will want a tailored suit, find books on patterncutting, patternmaking for tailored suites, you need to do lingerie patterns for another client, hurry up and find a book on patternmaking for lingerie, not sewing lingerie, patternmaking for lingerie, this will have more info on what you need where as the sewing type instruction book will have those less fitted designs you could have drafted on your own any way, that's not what your clients are asking for
(b) clients sometimes ask for their own size, they're fashionista designers and they fit into tiny clothes but they aren't the exact size of industry fit models so you need to learn pattern alterations, another reason for this, if a client is in a niche size market, say for a really big cup size and shape, then you'll definitely need pattern alteration skills, go to Amazon and look up pattern alteration books and dvds. Also do a google search for pattern alterations, you'll find ideas on people's blogs, there are a lot of them, as well as books, classes, dvds, see what people are saying before you spend your money though.
(c) definietly get a book on grading, clients don't ask for one little size, your clients will ask for all kind of sizes and the reason you want to know how to grade corrrectly is because you'll need and want to know how to take the basic bodice you know is a perfect fit and grade it into a perfect bodice of another size without serious fitting issues for your new clients.
Speaking of which, I've just ordered Connie Amaden Crawford's Pattern Grading workbook and can't wait to get it, to be sure. I've looked up grading info online and learnt some great stuff, but I don't really have the confidence I need to know, that I know what I'm doing for sure, I just have the courage to keep going. There's a difference, believe me.
Okay, I hope all you fellow aspiring patternmakers out there have found this at least somewhat enlightning. Also, as I collect more educational resources, books and dvds, I'll post the reviews of them here on my blog too. So be sure to come back again.
Good news is too, I was finally able to get through the Squidoo so that I can start editing and publishing changes on my lenses again, so hopefully between my current patternmaking client and article client I'll find a few moments here and there to update my two fashion lenses. Or I might leave it for a few weeks still. I'll make it easy and post announcements here for you guys.
If you'd like to read more about fashion, information on the industry and online schools check out my site at:
Budget Online Fashion Design Schools and Resources
If you're a designer or home sewer and you'd like to find some cool eco-friendly fabrics and more check out my resource page at:
The Eco-Friendly Fashion Designer's Resource Page
Saturday, February 18, 2012
Mother / Daughter Sloper Pattern Development
I started me and Salma's (my daughter) slopers a while back (was it about 2 - 3 weeks ago) but I haven't gotten a chance to cut them out and sew them yet to make a fitting. Once I do I'll develop the torso blocks we need from them. But here they are...I think it's kind of neat...


Actually, by the time I get to it, my daughter's sloper will probably need to be reworked, hahahaha, but I just had to try it, I graded/altered my size 6 sloper to make ours and it was pretty much a matter of moving the darts and their points in new locations and adjusting the bust side seam and widening the waist side seam and of course (sadly) shrinking the darts.
Than when I had that done for my own, I tried simply shrinking Salma's down by about half, I think it was the overall bodice height measurement or something, many of her measurements were actually almost half or just over half of my own measurements. And I only had to tweek her little bodice a tiny bit afterwards. So cool/cute.
Any way though, I'm not sure if the darts on hers are going to be needed but I'll see once I've got the fabric version sewed up, that will truly be exciting and when it happens I will be sure to post the photos.
Then I'll have to move on to the development of the sleeves as well, that should be interesting. As for my daughter's sloper, I think I'll probably be adding "growing room" ease to hers any way, like may a few inches to the side seams, you know, with a 1/2 " on each side, that will do it. Otherwise I'll make her something cute, like a matching outfit to one of my own, just for her to only wear it once. That would be a bummer. I'm thinking way ahead here, but after designing and drafting some cool patterns for my daughter, I can't wait to post the sewn designs on The Sewing Mamas forum. That's going to be awesome! I got to make the time for that for sure, cross my fingers...my son is going to school at the end of the year and I can't very well go there everyday dressed in the same frumpy clothes, like I've been doing, it would be a disaster. I've also got a pretty little daughter to set a good example for :)
If you'd like to read more about fashion, information on the industry and online schools check out my site at:
Budget Online Fashion Design Schools and Resources
If you're a designer or home sewer and you'd like to find some cool eco-friendly fabrics and more check out my resource page at:
The Eco-Friendly Fashion Designer's Resource Page


Actually, by the time I get to it, my daughter's sloper will probably need to be reworked, hahahaha, but I just had to try it, I graded/altered my size 6 sloper to make ours and it was pretty much a matter of moving the darts and their points in new locations and adjusting the bust side seam and widening the waist side seam and of course (sadly) shrinking the darts.
Than when I had that done for my own, I tried simply shrinking Salma's down by about half, I think it was the overall bodice height measurement or something, many of her measurements were actually almost half or just over half of my own measurements. And I only had to tweek her little bodice a tiny bit afterwards. So cool/cute.
Any way though, I'm not sure if the darts on hers are going to be needed but I'll see once I've got the fabric version sewed up, that will truly be exciting and when it happens I will be sure to post the photos.
Then I'll have to move on to the development of the sleeves as well, that should be interesting. As for my daughter's sloper, I think I'll probably be adding "growing room" ease to hers any way, like may a few inches to the side seams, you know, with a 1/2 " on each side, that will do it. Otherwise I'll make her something cute, like a matching outfit to one of my own, just for her to only wear it once. That would be a bummer. I'm thinking way ahead here, but after designing and drafting some cool patterns for my daughter, I can't wait to post the sewn designs on The Sewing Mamas forum. That's going to be awesome! I got to make the time for that for sure, cross my fingers...my son is going to school at the end of the year and I can't very well go there everyday dressed in the same frumpy clothes, like I've been doing, it would be a disaster. I've also got a pretty little daughter to set a good example for :)
If you'd like to read more about fashion, information on the industry and online schools check out my site at:
Budget Online Fashion Design Schools and Resources
If you're a designer or home sewer and you'd like to find some cool eco-friendly fabrics and more check out my resource page at:
The Eco-Friendly Fashion Designer's Resource Page
Wednesday, February 15, 2012
The Going Rates For Jacket and Tailored Suite Patterns
I've just completed my first fitted jacket, pattern and man, I truly understand why it's one of the most expensive garment to have a pattern drafted for. First of all , there are so many pieces, you've got the shell, the facings, the linings to make sure the jacket looks almost as good inside as it does outside and the interfacings that keep the crisp, clean cut look for the jacket. Then you've got to make sure all the pieces correspond with eachother correctly while not being the same shape. This is where careful notches come in.
Actually now that I've drafted a jacket pattern, I'd say that if someone just learnt how to correctly, professionally draft a fitted jacket they'd have the foundation to drafting all other patterns except, skirts and pants that is. I'm just exaggerating here, really, try constructing a bra with what you know about suit drafting, hmm...
When I read that the going rate for coat, jacket/suit and tailored blazer pattern drafting, ranges from $125 on up to $325 (this is actually separated into two categories) I thought it was a bit much, but not after getting a little experience in with the drafting process.
I want to nit pick my working process though to hone it to a perfection. To do this I'm going to use the information provided in the article "How To Hire A Patternmaker" at Design Entrepreneure.com and make up a bunch of colorful mini lists as a computer desktop image so I can go through them each time I complete a client's pattern. :) what a happy solution. I'll post my desktop list on my blog when I've got it completed so all of you fellow patternmakers out there can use it too if you like.
If my patternmaking progress and my blog posts seem a bit slow for a while, it's because aside from doing some patternwork for my clients as well as for myself when I catch a free hour or so, I've also got 5 writting projects to work on for my article client. The workload is heavy right now. But I'll try to keep things at least at a steadier trickle than I did before.
If you'd like to read more about fashion, information on the industry and online schools check out my site at:
Budget Online Fashion Design Schools and Resources
If you're a designer or home sewer and you'd like to find some cool eco-friendly fabrics and more check out my resource page at:
The Eco-Friendly Fashion Designer's Resource Page
Actually now that I've drafted a jacket pattern, I'd say that if someone just learnt how to correctly, professionally draft a fitted jacket they'd have the foundation to drafting all other patterns except, skirts and pants that is. I'm just exaggerating here, really, try constructing a bra with what you know about suit drafting, hmm...
When I read that the going rate for coat, jacket/suit and tailored blazer pattern drafting, ranges from $125 on up to $325 (this is actually separated into two categories) I thought it was a bit much, but not after getting a little experience in with the drafting process.
I want to nit pick my working process though to hone it to a perfection. To do this I'm going to use the information provided in the article "How To Hire A Patternmaker" at Design Entrepreneure.com and make up a bunch of colorful mini lists as a computer desktop image so I can go through them each time I complete a client's pattern. :) what a happy solution. I'll post my desktop list on my blog when I've got it completed so all of you fellow patternmakers out there can use it too if you like.
If my patternmaking progress and my blog posts seem a bit slow for a while, it's because aside from doing some patternwork for my clients as well as for myself when I catch a free hour or so, I've also got 5 writting projects to work on for my article client. The workload is heavy right now. But I'll try to keep things at least at a steadier trickle than I did before.
If you'd like to read more about fashion, information on the industry and online schools check out my site at:
Budget Online Fashion Design Schools and Resources
If you're a designer or home sewer and you'd like to find some cool eco-friendly fabrics and more check out my resource page at:
The Eco-Friendly Fashion Designer's Resource Page
Tuesday, January 31, 2012
Patternmaking In CorelDraw9
Wow, once you know how to use a software and you have a skill you can implement iton it, like patternmaking things can get really cool. With the precision of a software like CorelDraw9 program your confidense goes up and because you don't have to worry about wasting any fabric or paper you're ready to edit anything over and over again, save all your 'work in progress' steps as valuable resources and above all experiment. I grade my patterns, I build the seams, add the allocations and pattern markings, use slash and spread techniques and dart piviting as well as create and edit style lines all in one place. The only problem is that I couldn't measure curves.
This becomes a problem any time I had to true up the armcye and/or a sleeve cap. Before today I was printing out sections of my patterns and reprinting them from AdobePhotoshop CS2 whenever I had to walk the sleeves into their armholes and adjust their curves as needed because there was no way for me to perfectly measure them. Truly a nuisance. So I decided to look for how to measure curves in CorelDraw9 on Google.
I stumbled upon a forum where some guy who happened to be a CorelDraw user that developed a script for doing just that. Cool little thing too. Any way here's the full lowdown for any of you who may need such a curve measuring script:
(Thank you Peter Clifton of the UK, for putting out this free to download and edit script, God bless you big time)
First download the curve measuring script for your version of CorelDraw9 from Peter Clifton's page: http://www.clifton89.freeserve.co.uk/
Then follow the instructions about how to incorporate the file into your CorelDraw9 subdirectory (folder group in programs on your computer) Scroll down to the bottom of this page:
http://www.oberonplace.com/draw/drawscripts/megagallery/index.htm
And all this has got me to thinking about my own designs too. When I've completed patterns for my clients and I have a little extra free time, I could develop my patterns, say in a size 6 like my dressform and either sell them to home sewers who like my designs or sell them to clothing manufacturers who like them. Of course this means I'd most likely lose re-sale and distribution rights, but I won't mind that at all if I can get credit for my designs (not at all like when you work as ghost writer).
At this point, I have no idea what next time's post will be about, but it'll definitely be something cool about patternmaking or fashion design. I thank God for all the people out there that put together free information, programs and scripts for those who need them.
If you'd like to read more about fashion, information on the industry and online schools check out my site at:
Budget Online Fashion Design Schools and Resources
If you're a designer or home sewer and you'd like to find some cool eco-friendly fabrics and more check out my resource page at:
The Eco-Friendly Fashion Designer's Resource Page
This becomes a problem any time I had to true up the armcye and/or a sleeve cap. Before today I was printing out sections of my patterns and reprinting them from AdobePhotoshop CS2 whenever I had to walk the sleeves into their armholes and adjust their curves as needed because there was no way for me to perfectly measure them. Truly a nuisance. So I decided to look for how to measure curves in CorelDraw9 on Google.
I stumbled upon a forum where some guy who happened to be a CorelDraw user that developed a script for doing just that. Cool little thing too. Any way here's the full lowdown for any of you who may need such a curve measuring script:
(Thank you Peter Clifton of the UK, for putting out this free to download and edit script, God bless you big time)
First download the curve measuring script for your version of CorelDraw9 from Peter Clifton's page: http://www.clifton89.freeserve.co.uk/
Then follow the instructions about how to incorporate the file into your CorelDraw9 subdirectory (folder group in programs on your computer) Scroll down to the bottom of this page:
http://www.oberonplace.com/draw/drawscripts/megagallery/index.htm
And all this has got me to thinking about my own designs too. When I've completed patterns for my clients and I have a little extra free time, I could develop my patterns, say in a size 6 like my dressform and either sell them to home sewers who like my designs or sell them to clothing manufacturers who like them. Of course this means I'd most likely lose re-sale and distribution rights, but I won't mind that at all if I can get credit for my designs (not at all like when you work as ghost writer).
At this point, I have no idea what next time's post will be about, but it'll definitely be something cool about patternmaking or fashion design. I thank God for all the people out there that put together free information, programs and scripts for those who need them.
If you'd like to read more about fashion, information on the industry and online schools check out my site at:
Budget Online Fashion Design Schools and Resources
If you're a designer or home sewer and you'd like to find some cool eco-friendly fabrics and more check out my resource page at:
The Eco-Friendly Fashion Designer's Resource Page
Saturday, January 28, 2012
Lemon Tulip Lingerie Pattern Completed ! What To Do Next...
Here it is, my pattern is all done, anotations, pattern markings, seams and print ready layout:


If you'd like to read more about fashion, information on the industry and online schools check out my site at:
Budget Online Fashion Design Schools and Resources
If you're a designer or home sewer and you'd like to find some cool eco-friendly fabrics and more check out my resource page at:
The Eco-Friendly Fashion Designer's Resource Page


Now before I did the layout of the blocks I looked for a print shop that could make me a print out of the finished pattern. I settled on Staples, you got to love that place, however, unlike the Staples printing services that offer affordable printing for custom oversized print outs, Canadian Staples only offer print jobs that fit into poster sized layouts. This being 24 by 36 inches and 22 by 79 inches. Not bad but I would have liked having the US oversized Staples options available. Oh well, this will be good too.
I decided to make the front blocks pink and the back blocks green just so it would look pretty on my blog, but if I was sending this out to a client, I think I'd better stick with black. It's more professional, unless of course they like the color idea.
Now I have to find out how much it's going to cost to get this printed out for the prototype garment. If it's a bit too pricey for me right now, I guess I'll 'cut' the layout up in Adobe Photoshop and print the little letter size portions out on my HP and tape it all together. I'll only do that though if I get too impatient and someone isn't ready to send any work my way in the coming week.
This is so neat to be sewing up my own pattern. I know that it's going to be a big learning/thrill experience that will help me gain some terrific insight into patternmaking. However, I've got my worries too, such as
1. how relaxed and puffy will the gathers in the skirt and tulip sleeves look? I want it to look really floral, not tired
2. will the darts in the bodice allow the bodice to sit nicely on the bust area?
3. how will the wide, deep neckline sit on the shoulders and neck? (I took care of the gaposis issue following Connie's advice in her book "Patternmaking Made Easy" but you never know right with one this large, I'll learn through this experience)
4. how will the hem facing affect the hang and 'puff' of the tulip skirt? I hope it won't be too heavy
5. how will the bias cut effect the hang and puff of the tulip sleeves? Again, I want them to look floral not droopy, at the same time though I didn't want to give it a normal hem and stitchy up the edge of these "flowers" so I took up Roberta Carr's suggestion in her book "Couture: The Art Of Fine Sewing"
6. I cut the side seams of the bodice band at an angle matching the angle of the bodice side seams and I'm wondering if it'll allow the bodice to sit right and look okay while gently anchoring the garment just below the bustline?
So I'm apprehensive, excited and even a little scared, but my curiosity of course has got the better of me which is a good thing.
Soon as I have the esemble complete I'll post it here on my blog, but that may be awhile so the next several posts will mostly likely cover patternmaking issues/discoveries I make through working with my clients and so on.
Budget Online Fashion Design Schools and Resources
If you're a designer or home sewer and you'd like to find some cool eco-friendly fabrics and more check out my resource page at:
The Eco-Friendly Fashion Designer's Resource Page
Thursday, January 26, 2012
New Clients And How To Plan Out Your Digital Patternmaking Process
People are still contacting me about my patternmaking services even though I haven't refreshed my add since the first time I posted it. I do wish communication with people who contact me was consistent. Things happen though, one lady has had an unexpected tragedy in her family, this is usually a time consuming disaster in anyone's life, however, I think some people just starting out can get easily side tracked, like one fella I was talking to, that reminds me, I should email him again see what happened to him.
Never be afraid or put off emailing people, it's how to stay in touch. Don't always assume that people have changed their mind about you, it's just that there's so many things to do in work and life that if your services aren't needed "right now" than you may not hear from them in a while. However, this can put you at risk of being forgotten or shied away from. People will be like, "Gee, maybe she's forgotten about me and maybe I better contact someone else because she's probably gotten real busy, it's not like she's contacted me recently" You know what I mean?
So contact your contacts, hehehe, it won't hurt and they won't bite. I'm going to contact that guy right now... be right back.
Done. And they got back to me already too, so cool, you got to love clients who are that fast :) . So here it is, the fella I was talking about is just taking care of all the necessary prep work, he's got 3 shows coming up all in one month and one of my lady clients is going to send me a payment for some work I've done already.
Now for the Digital Patternmaking Process:
As I've done this several times already, I've worked out a step by step system for setting up and completing a digital pattern in the most efficient and time effective way, here it is:
1. pick out your sloper in the right size and type
2. don't get rid of anything in your pattern vector doc, you may need it for reference, alterations or even another pattern so keep everything and copy everything too
3. copy your sloper into the new garment pattern file making sure that front and back side seams have been aligned perfectly then separate a copy of them on a separate page (within the same vector file) but keep them on the same level (waist and bust lines are aligned across the page) this will help you keep your pattern drafting in correct orientation.
4. do your garment shells first
5. have a copy of all the necessary pattern markings you'll need ready on the outside of your pattern's vector page
6. group front and back pattern blocks then place them one on t0p the other with side seams matching
7. true up your pattern blocks and place your pattern markings
8. plan out your facings/interfacings
9. mark them accordingly
10. create your seams, plackets and hems
11. make as many copies of these front and back sandwiched blocks as other pattern pieces you'll be needing, for example if you need armscye, front and back facings, make a copy of the block 'sandwich' for each separate piece
12. ungroup the pattern block sandwiches and delete each unnecessary piece till you have each pattern piece you need from each group of front and back pattern block 'sandwiches'
13. group each new piece with their own separate pattern markings
14. arrange in order on the page, save again (do this often, make it almost like breathing)
15. export a copy as a jpeg and send it to your client and another one to yourself preferably in gmail should anything happen to your computer you'll still have your work in an email account that won't get rid of it
In my next blog post I hope to have a few pictures of my "lemon tulip lingerie" number as I'm almost done with the pattern. Just have to do those pretty little tulip sleeves. Slow going only because I've also been working on my clients projects. I'll have it completed before long though, no worries.
If you'd like to check out my fashion or eco friendly fashion resources lenses here are their links, feel free to drop me a note if you like what you see/read, I'll be happy to hear from you:
The Eco-Friendly Fashion Designer's Resource Page
Never be afraid or put off emailing people, it's how to stay in touch. Don't always assume that people have changed their mind about you, it's just that there's so many things to do in work and life that if your services aren't needed "right now" than you may not hear from them in a while. However, this can put you at risk of being forgotten or shied away from. People will be like, "Gee, maybe she's forgotten about me and maybe I better contact someone else because she's probably gotten real busy, it's not like she's contacted me recently" You know what I mean?
So contact your contacts, hehehe, it won't hurt and they won't bite. I'm going to contact that guy right now... be right back.
Done. And they got back to me already too, so cool, you got to love clients who are that fast :) . So here it is, the fella I was talking about is just taking care of all the necessary prep work, he's got 3 shows coming up all in one month and one of my lady clients is going to send me a payment for some work I've done already.
Now for the Digital Patternmaking Process:
As I've done this several times already, I've worked out a step by step system for setting up and completing a digital pattern in the most efficient and time effective way, here it is:
1. pick out your sloper in the right size and type
2. don't get rid of anything in your pattern vector doc, you may need it for reference, alterations or even another pattern so keep everything and copy everything too
3. copy your sloper into the new garment pattern file making sure that front and back side seams have been aligned perfectly then separate a copy of them on a separate page (within the same vector file) but keep them on the same level (waist and bust lines are aligned across the page) this will help you keep your pattern drafting in correct orientation.
4. do your garment shells first
5. have a copy of all the necessary pattern markings you'll need ready on the outside of your pattern's vector page
6. group front and back pattern blocks then place them one on t0p the other with side seams matching
7. true up your pattern blocks and place your pattern markings
8. plan out your facings/interfacings
9. mark them accordingly
10. create your seams, plackets and hems
11. make as many copies of these front and back sandwiched blocks as other pattern pieces you'll be needing, for example if you need armscye, front and back facings, make a copy of the block 'sandwich' for each separate piece
12. ungroup the pattern block sandwiches and delete each unnecessary piece till you have each pattern piece you need from each group of front and back pattern block 'sandwiches'
13. group each new piece with their own separate pattern markings
14. arrange in order on the page, save again (do this often, make it almost like breathing)
15. export a copy as a jpeg and send it to your client and another one to yourself preferably in gmail should anything happen to your computer you'll still have your work in an email account that won't get rid of it
In my next blog post I hope to have a few pictures of my "lemon tulip lingerie" number as I'm almost done with the pattern. Just have to do those pretty little tulip sleeves. Slow going only because I've also been working on my clients projects. I'll have it completed before long though, no worries.
If you'd like to check out my fashion or eco friendly fashion resources lenses here are their links, feel free to drop me a note if you like what you see/read, I'll be happy to hear from you:
The Eco-Friendly Fashion Designer's Resource Page
Tuesday, January 17, 2012
Patternmaking Progress Benefits Of Going Both Manual And Digital
If you're a manual patternmaker, meaning you draft your patterns entirely on paper, that's great, keep doing it, but you may also want to consider adding digital patternmaking to your capabilities as you'll enter a whole new world of perfection and precision. Sound good? It is. There are a few different ways of handling digital patternmaking if you aren't using patternmaking software and are simply using a vector program.
Why vector? Because it's easier to edit and move your lines, alter sizes and access seperate layers of your work without a hassle and your work taking a serious degradation hit as it will get if you use a bitmap editing program (Adobe Photoshop, PaintShopPro, etc) so I use CorelDraw9.
Another way cool thing about Using CorelDraw is changing the colors of your objects/layers is as simple as a click of a button. As for actual hands on measurements though, (I think this is probably the plus size that one may find with patternmaking software) CorelDraw doesn't allow you to measure curves, which is a nuisance, however, I just make a jpeg export file of my selected curve or pattern section, open it up in Adobe Photoshop and print it off to take the measurements. Then I'll make the necessary adjustments and repeat the proces till those curves are what they got to be.
I love manual pattern drafting, but it takes up the kitchen table all day and all night and that's a problem. Also, if you make an error, the whole pattern has to be done again rather than just a few lines having to be made or a copy of the original file needing to be tweeked. A lot easier to handle there, even if the experience isn't quite as much fun as traditional pattern drafting, you're still getting the job done especially if you're working from a drape you scanned into the computer because that's what I've been doing.
Just wish I had a model or a professional dressform with an arm attachment so I could do drapes of different sizes and properly check my sleeve draft.
My New York client wants to have a few samples produced before I begin the rest of the collection so I might have a day or two to work on my own portfolio pieces till I start back again. Once I get going on my portfolio pieces it'll also be some of the best patternmaking practice I've done because I'll get hands on, full, all around effort and results from draft to finished garment. This is something I can't do so well with my clients work because I'll never get to see the first sewn samples so I can't experience the purpose behind the adjustments that may need to be made.
With my own patterns though, I'll be able to tweek my pattern drafts to perfection and learn a lot of patternmaking secrets in the process.
I had a great idea last night though, I'm going to see if I can rent different size dressforms, or go somewhere to get access to them so I can drape different size bodice slopers. That would be so, so awesome if I could do that. That way I'd have a sloper size for every client's needs. Welll a lot of clients needs anyway, without having to guess whether or not I'm doing it right. If I can do that, I'll also look into getting some knit fabric so I can finally make my knit slopers. You see if I can do that, I won't actually have to invest a whole bunch of money into multiple dressforms or an adjustable one because I'll have those foundation slopers to make everything from. Unless of course I get into some serious draping. Then I'll still have a problem. I'm going to look into that today. There's a sewing shop nearby so I'm going to give them a call later.
As for working with clients, I stumbled upon a great resource a while back that was meant for the designer or company wanting to learn how to hire a patternmaker. I feel this 8 page e-book is very important for a patternmaker to read as well, just so he or she will also learn how they need to professionalize and perfect themselves (or rather, their work, I know, you're probably feeling "but I am my work :) , hehehe) and what to expect from your employer/client. This is so helpful. It may be a little scary, daunting to live up too, but knowing what's expected of you and taking the guess work out of what you need to know is great for getting a real handle of control over your efforts and focus. In the end, when you put in the time to perfect everything, it's empowering and well worth the extra effort. So if you have enough courage and faith in yourself to go the route, here's the link:
http://designer-entrepreneurs.com/hire.htm
If you'd like to check out my fashion or eco friendly fashion resources lenses here are their links, feel free to drop me a note if you like what you see/read, I'll be happy to hear from you:
The Eco-Friendly Fashion Designer's Resource Page
Why vector? Because it's easier to edit and move your lines, alter sizes and access seperate layers of your work without a hassle and your work taking a serious degradation hit as it will get if you use a bitmap editing program (Adobe Photoshop, PaintShopPro, etc) so I use CorelDraw9.
Another way cool thing about Using CorelDraw is changing the colors of your objects/layers is as simple as a click of a button. As for actual hands on measurements though, (I think this is probably the plus size that one may find with patternmaking software) CorelDraw doesn't allow you to measure curves, which is a nuisance, however, I just make a jpeg export file of my selected curve or pattern section, open it up in Adobe Photoshop and print it off to take the measurements. Then I'll make the necessary adjustments and repeat the proces till those curves are what they got to be.
I love manual pattern drafting, but it takes up the kitchen table all day and all night and that's a problem. Also, if you make an error, the whole pattern has to be done again rather than just a few lines having to be made or a copy of the original file needing to be tweeked. A lot easier to handle there, even if the experience isn't quite as much fun as traditional pattern drafting, you're still getting the job done especially if you're working from a drape you scanned into the computer because that's what I've been doing.
Just wish I had a model or a professional dressform with an arm attachment so I could do drapes of different sizes and properly check my sleeve draft.
My New York client wants to have a few samples produced before I begin the rest of the collection so I might have a day or two to work on my own portfolio pieces till I start back again. Once I get going on my portfolio pieces it'll also be some of the best patternmaking practice I've done because I'll get hands on, full, all around effort and results from draft to finished garment. This is something I can't do so well with my clients work because I'll never get to see the first sewn samples so I can't experience the purpose behind the adjustments that may need to be made.
With my own patterns though, I'll be able to tweek my pattern drafts to perfection and learn a lot of patternmaking secrets in the process.
I had a great idea last night though, I'm going to see if I can rent different size dressforms, or go somewhere to get access to them so I can drape different size bodice slopers. That would be so, so awesome if I could do that. That way I'd have a sloper size for every client's needs. Welll a lot of clients needs anyway, without having to guess whether or not I'm doing it right. If I can do that, I'll also look into getting some knit fabric so I can finally make my knit slopers. You see if I can do that, I won't actually have to invest a whole bunch of money into multiple dressforms or an adjustable one because I'll have those foundation slopers to make everything from. Unless of course I get into some serious draping. Then I'll still have a problem. I'm going to look into that today. There's a sewing shop nearby so I'm going to give them a call later.
As for working with clients, I stumbled upon a great resource a while back that was meant for the designer or company wanting to learn how to hire a patternmaker. I feel this 8 page e-book is very important for a patternmaker to read as well, just so he or she will also learn how they need to professionalize and perfect themselves (or rather, their work, I know, you're probably feeling "but I am my work :) , hehehe) and what to expect from your employer/client. This is so helpful. It may be a little scary, daunting to live up too, but knowing what's expected of you and taking the guess work out of what you need to know is great for getting a real handle of control over your efforts and focus. In the end, when you put in the time to perfect everything, it's empowering and well worth the extra effort. So if you have enough courage and faith in yourself to go the route, here's the link:
http://designer-entrepreneurs.com/hire.htm
If you'd like to check out my fashion or eco friendly fashion resources lenses here are their links, feel free to drop me a note if you like what you see/read, I'll be happy to hear from you:
The Eco-Friendly Fashion Designer's Resource Page
Subscribe to:
Posts (Atom)